

Struggling to type in another language or with a different layout? Learning how to add a new keyboard language option windows provides is easier than you think. This guide walks you through adding, switching, and managing keyboard layouts in Windows 11, making you multilingual in just a few clicks.
- How to Add a New Keyboard Language Option Windows 11
- How to Add a New Keyboard Language Option Windows 10
- More Than Just Languages: Specialized and Ergonomic Layouts
- How to Switch Between Keyboard Languages
- Understanding the Difference: Display Language vs. Keyboard Layout
- Advanced Customization: Fine-Tuning Your Keyboard Settings
- Troubleshooting Common Keyboard Issues
- Frequently Asked Questions (FAQ)
- Conclusion
How to Add a New Keyboard Language Option Windows 11
First, let’s get your new keyboard installed. Windows 11 centralizes this process within the Settings app, making it incredibly straightforward.
Step-by-Step: Using the Settings App
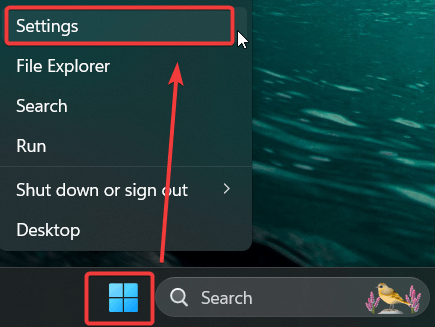
- Open the Settings app. The quickest way is by pressing the Windows Key + I shortcut on your keyboard.
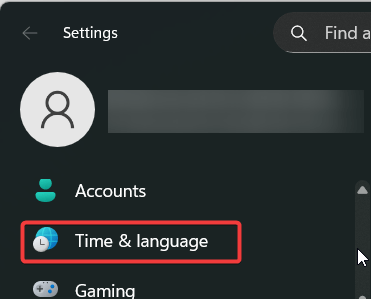
- Next, navigate to the Time & language tab from the menu on the left.
- Choose the Language & region option from the list.

- You will see your currently installed display language (e.g., English (United States)). Click the three-dot menu (…) next to it and select Language options.


- In the Keyboards section, you will see your currently installed layouts. Click the Add a keyboard button to open the list of available layouts.

- Finally, scroll through the pop-up list and select the keyboard layout you want to add. Once you click it, it will be added instantly. You can now close the Settings app.

How to Add a New Keyboard Language Option Windows 10
To begin, open the Settings app by pressing Windows key + I.
Then, head to Time & Language > Language.


Under Preferred languages, click the language you want to edit and then click Options

Under Keyboards section, click on “Add a keyboard”.

Choose any preferred keyboard you want.

Once choose, you can see the new keyword language appeared.

More Than Just Languages: Specialized and Ergonomic Layouts
Remember, adding a keyboard isn’t just for typing in a different language. You can also add specialized layouts to enhance your workflow. For example:
- Ergonomics: Add the Dvorak layout to improve typing speed and comfort.
- Programming: Many developers using a non-US keyboard add the standard English (United States) layout for easier access to common programming symbols like brackets [], braces {}, and the backslash \.
- Specialized Characters: Add a layout like Greek to easily type mathematical symbols like pi (π) or delta (Δ).
How to Switch Between Keyboard Languages
Once you have more than one keyboard layout installed, you need a way to switch between them. Fortunately, Windows offers two simple methods to do this on the fly.
Method 1: Using the Taskbar
The most visual way to switch is by using the language icon in your taskbar’s system tray.
Look for the language abbreviation on the right side of your taskbar (e.g., ENG US).

Click on it. A panel will appear showing all your installed keyboard layouts.
Simply click on the one you want to start using.

Method 2: Using Keyboard Shortcuts
For a much faster workflow, keyboard shortcuts are essential.
- Primary Shortcut: Press the Windows Key + Spacebar. This will bring up the same language panel as the taskbar method. Keep holding the Windows key and press Spacebar to cycle through the layouts.
- Alternate Shortcut: The classic Left Alt + Shift shortcut also works to instantly cycle to the next keyboard layout in your list without bringing up a visual interface.
A Note on Touch and On-Screen Keyboards
For users of tablets and 2-in-1 devices, any keyboard you add is automatically available on the Windows 11 touch keyboard. When the touch keyboard is active, you can tap the keyboard icon near the bottom-left to switch between your installed layouts and themes instantly.
Additional Info: If you no longer need a keyboard layout, keeping your list clean is good practice. Removing a keyboard is just as easy as adding one. Follow our complete step-by-step on How to Remove Keyboard Layout in Windows 11 & 10 (Complete Guide)
Understanding the Difference: Display Language vs. Keyboard Layout
The Windows Display Language is the language you see throughout the operating system—in menus, settings, and notifications. A Keyboard Layout (or input language), however, is what determines which characters appear when you type.
If you want to change the display language, refer our step-by-step guide on Change Display Language Preferences Easily Windows 11 & 10 (Ultimate Guide).
Advanced Customization: Fine-Tuning Your Keyboard Settings
For those who want more control, Windows offers deeper settings to customize your experience.
- Navigate to Settings > Time & language > Typing.
- Click on Advanced keyboard settings.
- From here, you can customize two key features:
- Override for default input method: This allows you to select a specific keyboard layout to be used as the default for all applications.
- Input language hot keys: Click this to open a legacy settings panel where you can change the key combination (e.g., from Left Alt + Shift to Ctrl + Shift) used to switch between keyboards.
Additional Info: While Windows provides default shortcuts, you can gain even more control over your keyboard with Microsoft PowerToys. Its Keyboard Manager utility allows you to remap keys and create custom shortcuts.
Troubleshooting Common Keyboard Issues
Sometimes things don’t work as expected. Here are solutions to a couple of the most common problems.
The Language Bar is Missing from the Taskbar
If the language abbreviation (e.g., “ENG”) disappears from your taskbar, it may have been accidentally disabled.
To get it back, go to Settings > Time & language > Typing > Advanced keyboard settings.
Check the box that says “Use the desktop language bar when it’s available”.
Frequently Asked Questions (FAQ)
Q: Can I set a different keyboard layout for a specific app?
A: Yes. In the Advanced keyboard settings menu, there is an option to “Let me use a different input method for each app window.” Checking this box will make Windows remember which keyboard you were using in each application and switch to it automatically.
Q: Will adding a new keyboard language change my Windows display language?
A: No. Following the steps in this guide only adds an input method. Your Windows interface, menus, and apps will remain in your primary display language. For more information on the difference, you can read the official Microsoft documentation on language packs.
Conclusion
You’re all set! As you can see, managing keyboard languages in Windows 11 is a simple and powerful feature. In just a few minutes, you’ve learned how to add the exact layout you need, switch to it seamlessly, customize advanced settings, and even troubleshoot common issues. This small change can dramatically improve your productivity and communication across different languages.
Now it’s your turn. Give it a try, and let us know in the comments if you have any questions. If this guide helped you, consider sharing it with others who might find it useful
IT Security / Cyber Security Experts.
Technology Enthusiasm.
Love to read, test and write about IT, Cyber Security and Technology.
The Geek coming from the things I love and how I look.