
Is your screen either blindingly bright or uncomfortably dim? Learning how to adjust display brightness settings easily in Windows is a simple skill that can protect your eyes from strain and significantly boost your laptop’s battery life.
This complete guide will walk you through every possible method, from the quickest two-second fix to powerful controls you might not know exist.
- How to Adjust Display Brightness Settings Easily Windows
- Method 1: The Quickest Way via Quick Settings (Action Center)
- Method 2: For Ultimate Control: Using Third-Party Apps
- Method 3: Use Your Keyboard’s Function Keys
- Method 4: Through the Windows Settings App
- Method 5: For Laptops: The Windows Mobility Center
- Method 6: From Your Graphics Control Panel (NVIDIA, AMD, Intel)
- What is the Best Brightness Level for Your Eyes?
- Pro Tip: Create a Desktop Shortcut for Faster Access
- Beyond Brightness: HDR, Adaptive Brightness, and Night Light
- How to Fix a Missing or Unresponsive Brightness Slider
- Frequently Asked Questions (FAQ)
- Conclusion: Take Control of Your Display
How to Adjust Display Brightness Settings Easily Windows
Method 1: The Quickest Way via Quick Settings (Action Center)
First and foremost, the simplest way to change your screen’s brightness is through the built-in Quick Settings panel.
For Windows 11 Users:
Click the network, speaker, or battery icon in the bottom-right corner of the taskbar. You can also press the Windows key + A shortcut.
The Quick Settings menu will instantly appear.
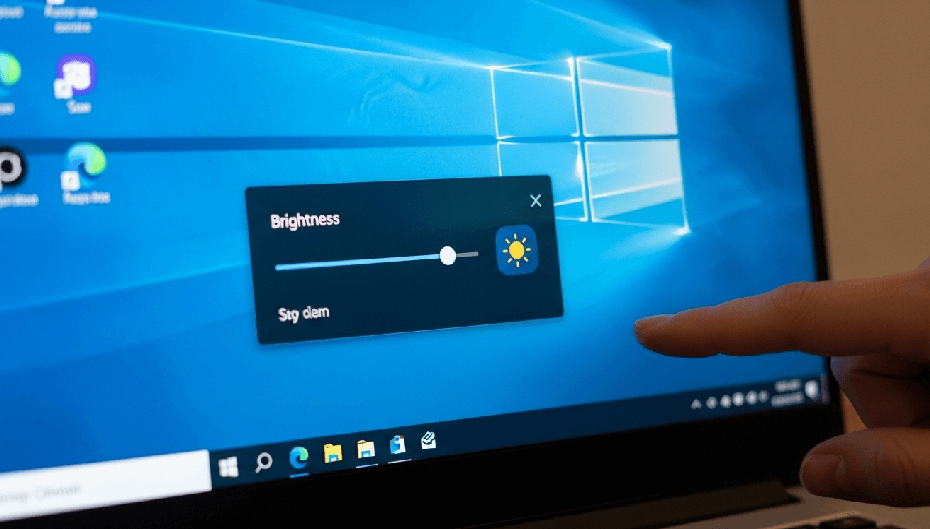
Simply drag the brightness slider, which has a sun icon, left or right to decrease or increase the screen luminosity.

For Windows 10 Users:
Click the notification icon in the far-right corner of the taskbar to open the Action Center. The Windows key + A shortcut also works here.
At the bottom of the Action Center, you will find a brightness slider.

Move the slider to perfectly match your preferred brightness level.
If it happens on external monitor, you can use Method 2 below by using third-party apps.
Method 2: Using Third-Party Apps (Best for external monitor)
This is the best solution for desktop users who want software control over their external monitors. An application like Twinkle Tray Brightness Slider lets you manage the brightness of multiple monitors right from your taskbar.
- You can download Twinkle Tray from the Microsoft Store for a safe and easy installation.
- After it’s installed, a new icon will appear in your system tray.
- Click that icon to reveal individual brightness sliders for all of your connected monitors.
Method 3: Use Your Keyboard’s Function Keys
For immediate adjustments without using your mouse, your keyboard is your best friend. Almost every laptop has dedicated keys to control screen brightness.
- Look at the top row of your keyboard for the function keys (F1-F12).
- Find two keys marked with a sun icon—one typically looks like a small sun for decreasing brightness and a larger sun for increasing it.
- You may need to hold the Fn key (usually in the bottom-left of the keyboard) while pressing the corresponding function key for it to work.
Method 4: Through the Windows Settings App
If you want more precise control over your display settings, the main Windows Settings application is the place to go.
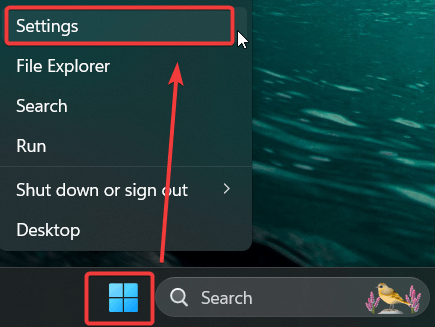
Right-click the Start Menu and select Settings. Alternatively, press the Windows key + I to open it directly.
In the Settings window, make sure you are on the System tab.
Next, click on the Display option.

Under the “Brightness & color” section, you’ll see a Brightness slider. Drag it to your desired level.

Method 5: For Laptops: The Windows Mobility Center
The Windows Mobility Center is a useful, though less common, control panel that gathers several important settings in one place, making it perfect for laptop users.
Right-click the Start Menu and select Mobility Center.

A window will pop up showing several tiles. You can easily adjust the Display brightness slider located at the top of the window.

Method 6: From Your Graphics Control Panel (NVIDIA, AMD, Intel)
When the standard Windows slider isn’t working or you need more granular control, your graphics card’s software is a powerful alternative.
- Right-click on an empty space on your desktop.
- Look for an option like NVIDIA Control Panel, AMD Radeon Software, or Intel Graphics Command Center.
- Open the relevant panel and find the section for “Display” or “Desktop Color Settings.”
- From here, you can adjust brightness, contrast, and other color settings with precision.
What is the Best Brightness Level for Your Eyes?
Now that you know how to change your brightness, what level should you actually choose? For the best ergonomic results and to avoid eye strain, your goal should be to match your screen’s brightness to the ambient light of your room.
Here is a simple test: open a blank white document and hold a white piece of paper next to your monitor. If the paper looks much dimmer than your screen, your display is too bright. If the paper looks brighter than the screen, your display is too dim. Adjust your screen’s brightness until its white background blends naturally with the paper.
Pro Tip: Create a Desktop Shortcut for Faster Access
If you adjust your brightness often, why not make it even easier? You can create a desktop shortcut that takes you directly to the Display settings page.
- Right-click on an empty area of your desktop.
- Choose New > Shortcut.
- In the location box, type this exact command: ms-settings:display and then click Next.
- Name your shortcut something memorable, like “Display Settings,” and click Finish.
You now have a one-click icon to access the brightness slider and other display options instantly.
Beyond Brightness: HDR, Adaptive Brightness, and Night Light
Windows offers several smart features that work alongside brightness to improve your viewing experience.
- HDR (High Dynamic Range): If you use an HDR-capable display, Windows has a separate setting for it. You can find it in Settings > System > Display > HDR. Here, an “HDR content brightness” slider lets you adjust the luminosity specifically for HDR videos and games without affecting your main system brightness.
- Adaptive Brightness: This feature uses a light sensor in your device to automatically adjust screen brightness based on your environment. It’s great for conserving battery but can sometimes be distracting. You can turn it on or off in Settings > System > Display.
- Night Light: This feature helps reduce eye strain by filtering out blue light and giving your screen a warmer, amber tint. This is especially helpful at night. You can schedule Night Light to turn on automatically from the Display settings menu.
How to Fix a Missing or Unresponsive Brightness Slider
Is your brightness slider suddenly missing or grayed out? This is a common problem, but it’s almost always solvable.
Solution 1: Update Your Display Driver
- Right-click the Start Menu and choose Device Manager.
- Expand the Display adapters section.
- Right-click your graphics adapter (like Intel UHD Graphics or NVIDIA GeForce) and select Update driver.
- First, choose Search automatically for drivers. If that doesn’t find anything, visit the manufacturer’s website (NVIDIA, AMD, or your laptop brand) to download the latest driver manually.
Solution 2: Re-enable the Display Adapter
- Open Device Manager again.
- Right-click your display adapter and choose Disable device.
- Wait a few seconds, then right-click it again and choose Enable device. This simple reset often forces Windows to recognize it correctly.
Solution 3: Fix for Function Keys Not Working
If only your keyboard’s brightness keys have stopped working, you are likely missing manufacturer-specific software. Go to your laptop brand’s support website (like Dell, HP, or Lenovo) and search for a “Hotkey Driver,” “Function Key Driver,” or “System Control” utility. Installing this restores the keys’ special functions.
Frequently Asked Questions (FAQ)
Why can’t I adjust the brightness on my desktop PC using Windows settings?
Most desktop monitors have their own physical buttons to control brightness. The software controls inside Windows are mainly for integrated displays, like those on laptops. For software control on desktops, a third-party app like Twinkle Tray (Method 6) is your best solution.
Does lowering screen brightness actually save battery?
Yes, absolutely. The display is one of the biggest power consumers on a laptop. Lowering your screen brightness is one of the most effective ways to make your battery last longer, especially when you are on the move.
Conclusion: Take Control of Your Display
As you have seen, Windows provides a full suite of tools to manage your screen’s brightness. For a quick adjustment, the Quick Settings panel or your keyboard shortcuts are the fastest options.
For more complex issues, updating your display driver or using a third-party app will solve the problem. You are now fully equipped to make sure your screen is always perfectly lit for comfort, productivity, and battery conservation.
Was this guide helpful? If so, please share it with a friend or colleague! If you have another question or a favorite method we didn’t cover, leave a comment below.
IT Security / Cyber Security Experts.
Technology Enthusiasm.
Love to read, test and write about IT, Cyber Security and Technology.
The Geek coming from the things I love and how I look.