
Tired of that generic grey icon every time you log in? You can change your user account picture easily windows provides all the tools you need built right in. This simple guide will walk you through every step, with clear instructions to personalize your PC in just a few clicks.
First, A Quick Note: Local vs. Microsoft Accounts
Before you begin, it’s helpful to know what type of account you have, as it affects where your picture is displayed.
- Local Account: This account exists only on your PC. The picture you set will only appear on this specific device.
- Microsoft Account: This account is tied to an email address (like @outlook.com or @hotmail.com) and syncs your settings across all devices and Microsoft services you sign into. Changing your picture here will also change it in Outlook, Microsoft 365, Skype, and more.
This guide covers both scenarios, so let’s get started.
Change Your User Account Picture Easily Windows
Method 1: Using the Windows Settings App (For All Accounts)
First and foremost, the easiest way to update your profile image is through the Windows Settings menu. This method is the most direct and works seamlessly for both Windows 11 and Windows 10.
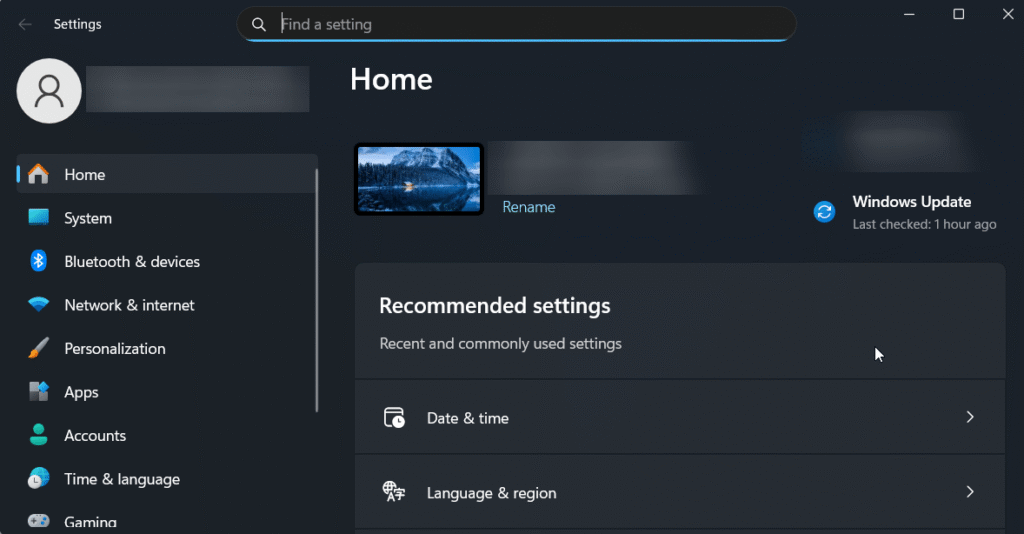
Open the Settings App. To begin, press the Windows key + I on your keyboard to open the Settings window.
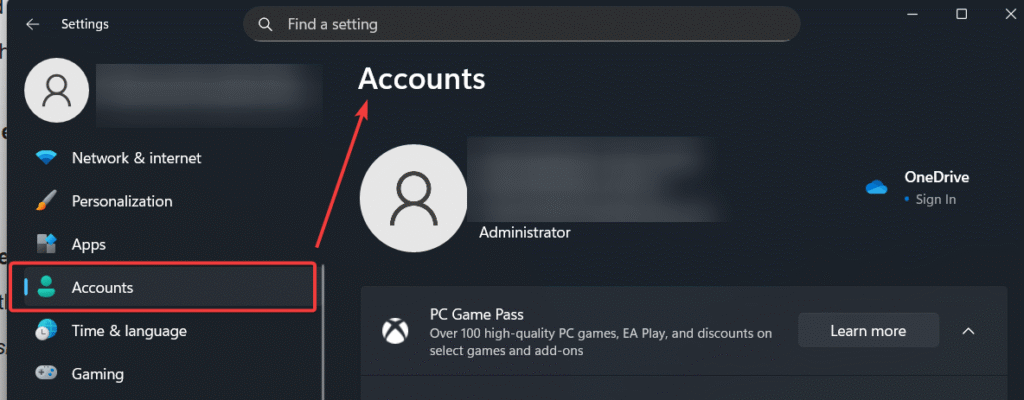
Navigate to the Accounts Section. Next, look at the left-hand sidebar in the Settings window and click on the Accounts tab. This is your hub for all user-related settings.
Select ‘Your info’. Once you’re in the Accounts section, the first option you’ll see is Your info. Go ahead and click on it to access your profile details.
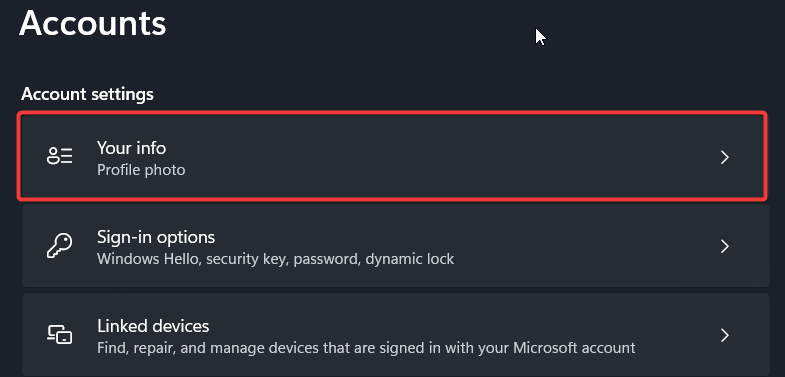
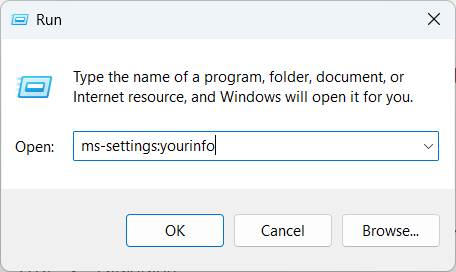
For an even faster shortcut directly to the right page, press Windows key + R to open the Run dialog, type ms-settings:yourinfo, and hit Enter.
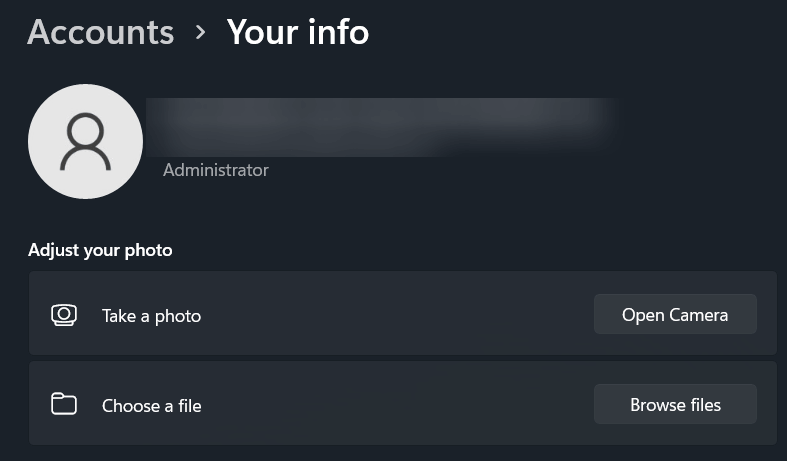
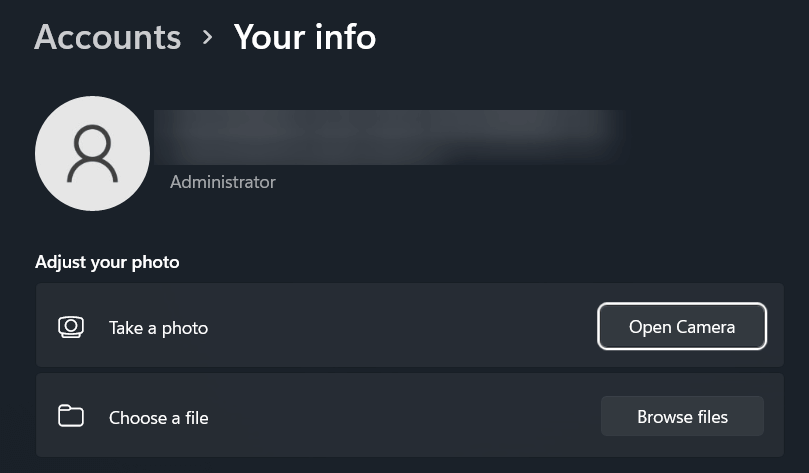
Choose Your New Picture. Finally, under the Adjust your photo heading, Windows gives you two simple options:
- Click Open camera to use your device’s webcam to take a brand-new photo.
- Click Browse files to select an image file already saved on your computer.
Simply select your preferred option, and your account picture will update immediately.
Troubleshooting: Option to Change Picture is Greyed Out?
Ever find the option to change your picture is disabled or you see a message that says, “Some of these settings are managed by your organization“?
This is common on computers provided by a workplace or school. Your system administrator has likely set a Group Policy to prevent users from changing their account picture to maintain a uniform look. Unfortunately, in this case, you will need to contact your IT department for assistance.
Method 2: Change Your Microsoft Account Picture Online
If you use a Microsoft Account and want to ensure your picture is updated everywhere, you can do it directly on the web.
Open your web browser and navigate to the official Microsoft Account page: account.microsoft.com.
Sign in with your email address and password.
At the top left, click on the Your info tab.
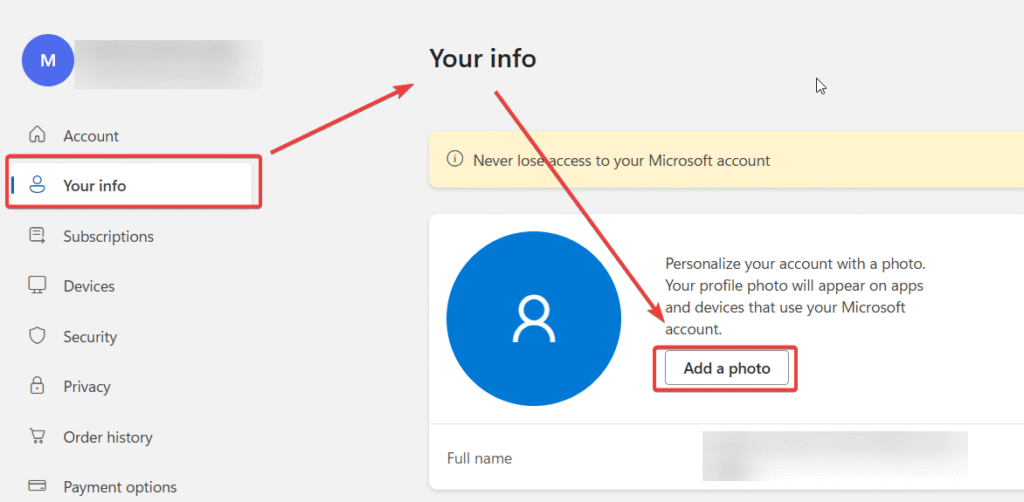
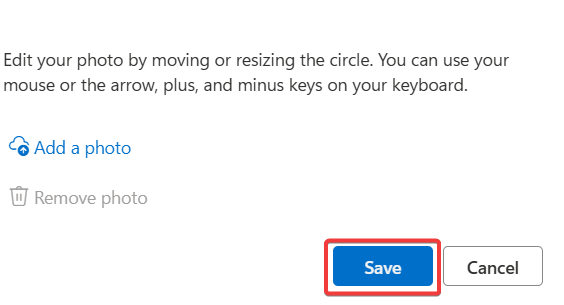
You will see your current profile picture. Click Add a photo, then click Add a photo on a windows pop-up.
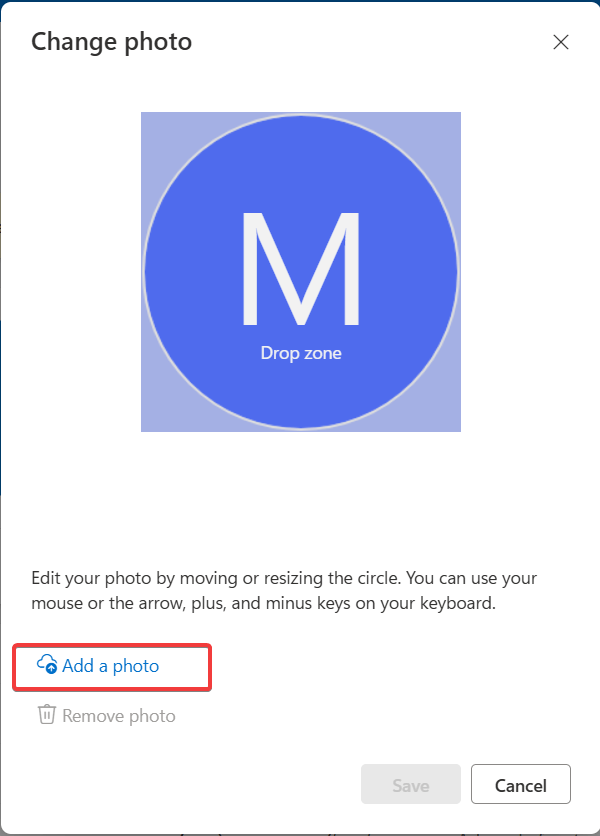
Once choose the photo from you computer, click Save.
Did You Know? Using a Short Video as Your Account Picture
While modern versions of Windows focus on static images, some editions of Windows 10 allowed users to set a short video clip (.mp4) as their account picture. This video would play in a short loop on the Windows login screen, creating a dynamic, animated effect.
While this feature is no longer prominent, it’s a fun piece of Windows history that shows how much personalization has been explored.
How to Remove Old Account Pictures
Whenever you change your picture, Windows helpfully saves the old ones. If you want to clean these up, the process is straightforward.
- Open File Explorer by pressing Windows key + E.
- Copy and paste the following path into the address bar and press Enter:
%appdata%\Microsoft\Windows\AccountPictures - You will now see all the previous account pictures you’ve used. Simply select the ones you no longer want and delete them.
How to Change the Default Account Picture for New Users (Advanced)
For system administrators or users who want to set a custom default image for any new accounts created on their PC, you can replace the default system files.
Disclaimer: This involves changing system files. Please proceed with caution.
- Prepare your desired default image. It must be a PNG file, and you will need to create versions in several sizes (e.g., 448×448, 240×240, etc.).
- In File Explorer, navigate to: C:\ProgramData\Microsoft\User Account Pictures. You may need to enable “Show hidden items” in the View menu.
- Here you will see the default user.png files and other size variations.
- Carefully replace the default system images with your own custom images, ensuring you match the file names and dimensions exactly.
Frequently Asked Questions (FAQ)
Why isn’t my account picture changing?
Sometimes, especially with a Microsoft account, there can be a slight delay as the new image syncs with Microsoft’s servers. If it doesn’t update after a few hours, try restarting your computer. For local accounts, the change should be instant.
Why does my new account picture look blurry?
This usually happens if the image you uploaded has a very low resolution. Windows uses the picture in various sizes, so for the best results, start with a high-quality square image, preferably at least 448×448 pixels.
Does this change my picture in apps like Skype or Outlook?
Yes, if you are using a Microsoft Account and change your picture using either Method 1 or 2, the new image will sync across most Microsoft services you are signed into.
Where does Windows store my account pictures?
Windows stores your current and previous account pictures in a hidden system folder located at C:\Users\[Your Username]\AppData\Roaming\Microsoft\Windows\AccountPictures.
Can I go back to the default grey icon?
Yes. To revert to the default user icon, you’ll need to remove all custom images from the AccountPictures folder mentioned above.
Conclusion
And there you have it! Changing your user account picture is one of the quickest ways to make your Windows experience feel truly personal. By following these simple steps, you’ve seen how to not only add a new image using multiple methods but also manage your old ones, troubleshoot common issues, and even set a custom default.
Now your login screen and Start Menu will have a personal touch. If you found this guide helpful, feel free to share it with a friend! Did you run into any issues? Let us know in the comments below.
IT Security / Cyber Security Experts.
Technology Enthusiasm.
Love to read, test and write about IT, Cyber Security and Technology.
The Geek coming from the things I love and how I look.