
Tired of the default black screen or bubbles? Customizing your screen saver is one of the quickest ways to personalize your PC
Just as you can customize your screen saver settings windows, you can set up a custom photo slideshow or a secure, password-protected display in just a few clicks.
- How to Customize Your Screen Saver Settings in Windows 11
- How to Customize Your Screen Saver Settings in Windows 10
- Customizing Common Windows Screen Savers
- Important Screen Saver Configurations
- Power User Tips for Screen Savers
- Exploring Custom and Third-Party Screen Savers
- For Administrators: Managing Settings with Group Policy
- Troubleshooting: Common Screen Saver Issues
- Frequently Asked Questions (FAQ)
- Conclusion
How to Customize Your Screen Saver Settings in Windows 11
Windows 11 features a sleek, modern settings menu, but the classic screen saver options are still there if you know where to look. Let’s walk through it step-by-step.
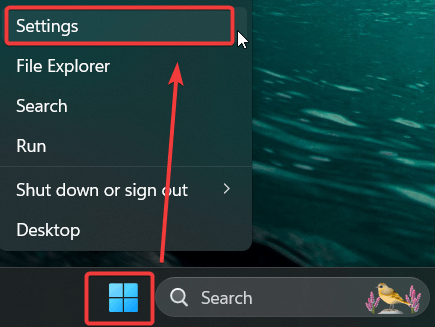
First, right-click the Start menu button on your taskbar and select Settings from the pop-up menu.
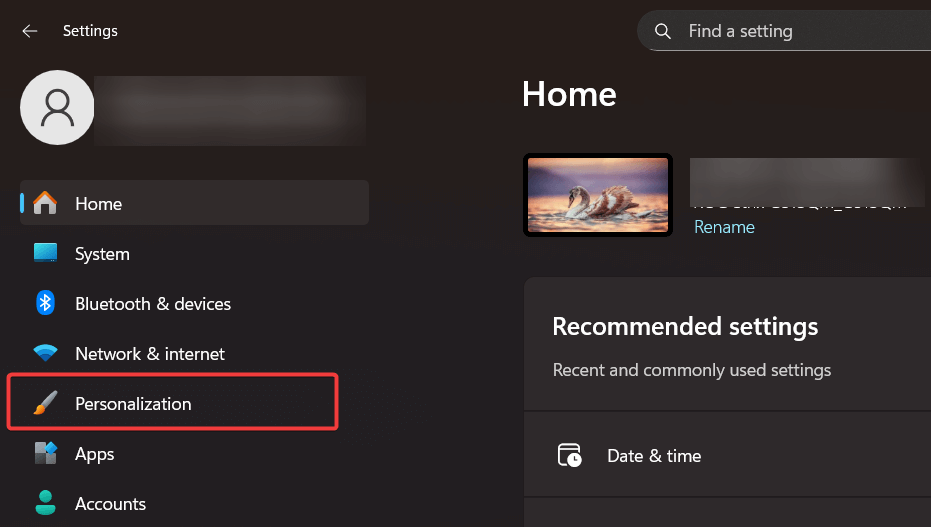
Next, in the left-hand navigation pane of the Settings window, click on Personalization.
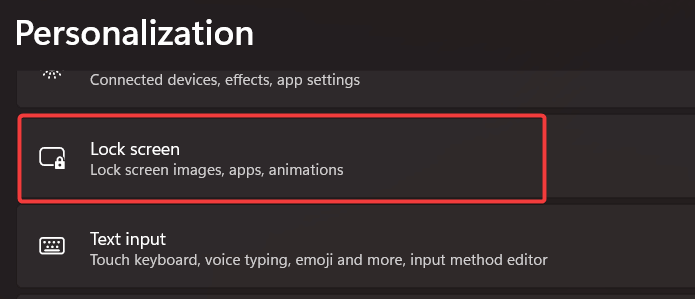
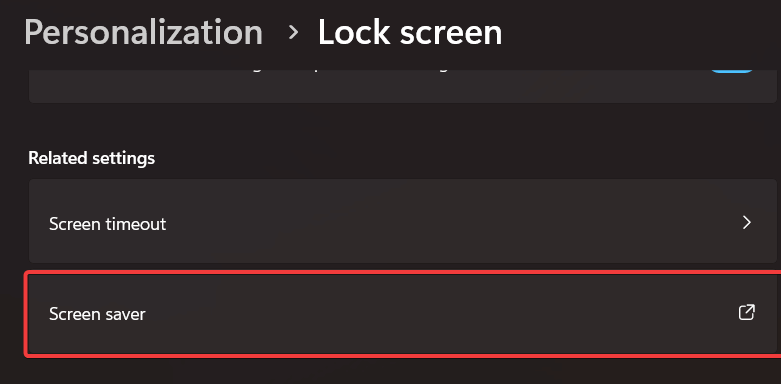
After that, scroll down through the list of options and select Lock screen.
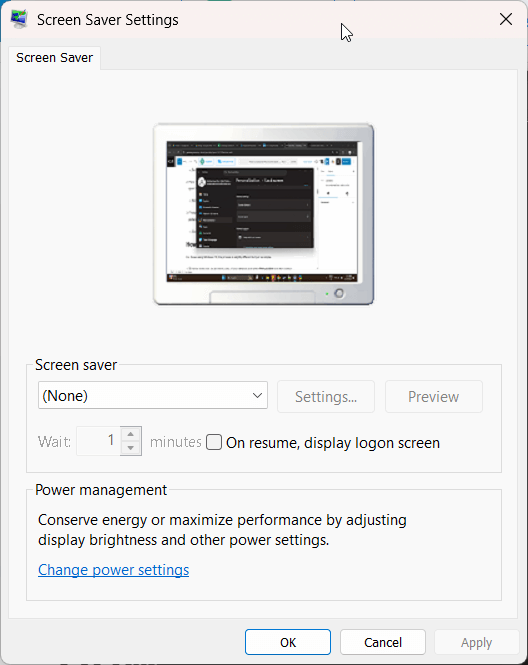
Here, you’ll need to find the “Related settings” section. Click on the Screen saver link. This will open the familiar Screen Saver Settings window from previous Windows versions.
Finally, from this window, you can choose and configure your screen saver to your exact preferences.
How to Customize Your Screen Saver Settings in Windows 10
For those using Windows 10, the process is slightly different but just as simple.
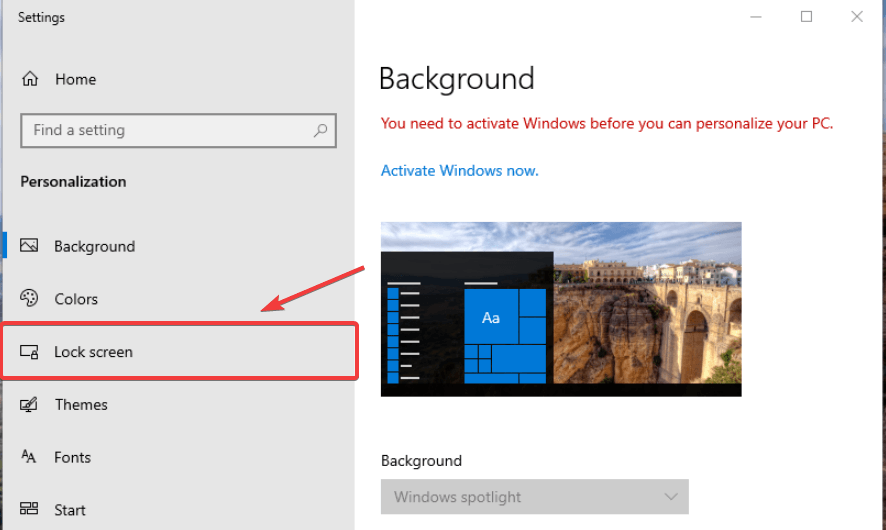
To begin, right-click on an empty area of your desktop and select Personalize from the context menu.

In the Settings window that appears, choose Lock screen from the left-hand menu.
Now, scroll down until you see the Screen saver settings link and click it.
This action will bring up the same Screen Saver Settings panel, where you can make all your adjustments.
Customizing Common Windows Screen Savers
Simply selecting a screen saver is just the beginning. The real fun comes from customizing them.
Using Your Own Photos as a Screen Saver
One of the most popular options is creating a slideshow of your favorite pictures.
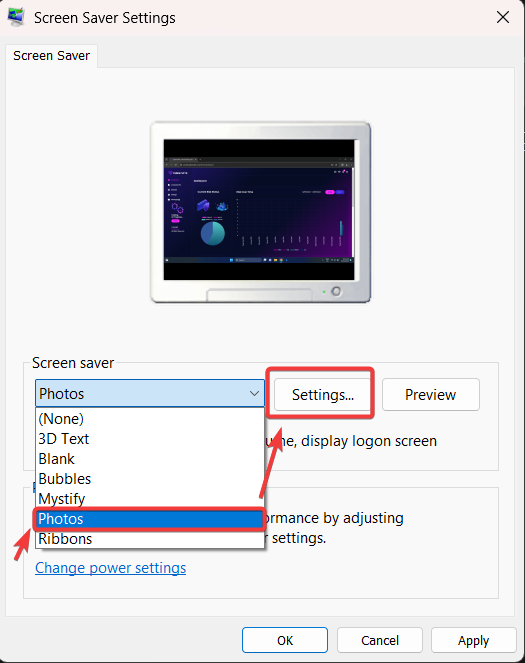
In the Screen Saver Settings window, select Photos from the dropdown list.
Then, click the Settings button next to it.
Click Browse and navigate to the folder on your computer that contains the pictures you want to display.
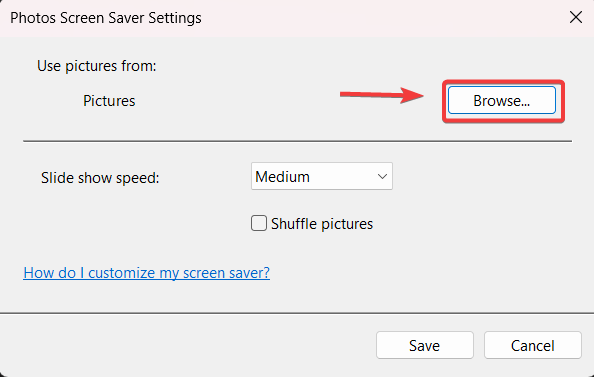
You can also choose a slide show speed, from slow to fast, and check the box to shuffle the pictures for a random order. Click Save when you’re done.
Customizing the 3D Text Screen Saver
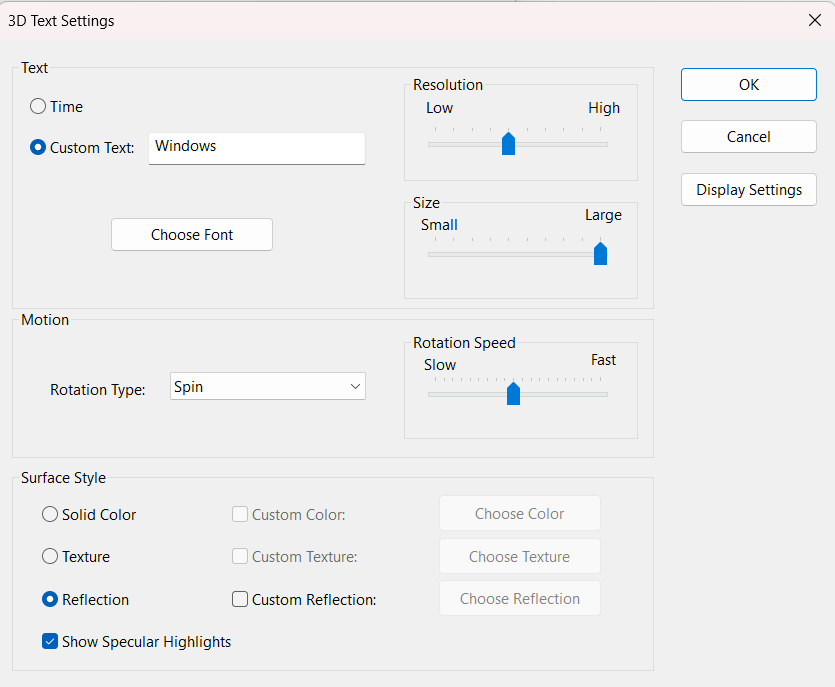
The 3D Text option lets you display a custom message that floats across your screen.
Furthermore, you can adjust the rotation speed, size, and resolution to get the perfect effect. You can even choose custom colors and textures.
Choose 3D Text from the dropdown menu and click Settings.
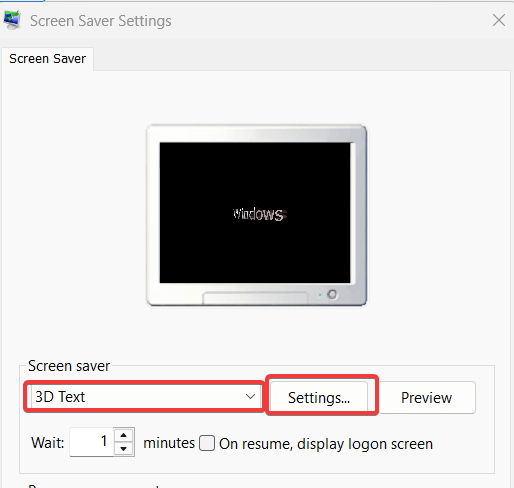
Here, you can type your own custom text, choose a font, and select a motion style like “Spin” or “Tumble.”
The ‘Blank’ Screen Saver: A Minimalist’s Choice for Performance
Don’t overlook the Blank option. While it’s not visually exciting, it is the most resource-friendly choice. It uses virtually zero CPU or GPU power, making it the ideal selection if you are running performance-heavy tasks like rendering a video, playing a game, or training an AI model in the background.
Important Screen Saver Configurations
Beyond aesthetics, there are a couple of crucial settings you should pay attention to.
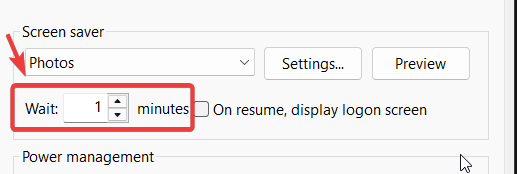
Setting the Wait Time
The Wait box lets you determine how long your computer must be idle before the screen saver activates. This is measured in minutes. Setting it to 5 minutes is a common choice for a good balance.
Requiring a Password on Resume
For a vital layer of security, check the box labeled On resume, display logon screen. When this is enabled, you will need to enter your Windows password to exit the screen saver and get back to your desktop. This is essential for protecting your work if you step away from your computer in an office or public space.
Power User Tips for Screen Savers
Create a Shortcut to Access Settings Instantly
If you frequently adjust your screen saver, you can create a desktop shortcut to open the settings instantly.
- Right-click on an empty area of your desktop and select New > Shortcut.
- In the location box, paste the following command: control desk.cpl,,@screensaver.
- Click Next, give your shortcut a name (like “Screen Saver Settings”), and click Finish.
Create a Shortcut to Instantly Start Your Screen Saver
For even more efficiency, you can create a shortcut that launches your default screen saver on demand—perfect for locking your PC in a hurry.
- Create a new shortcut as described above.
- This time, in the location box, paste the following path: %windir%\System32\rundll32.exe user32.dll,LockWorkStation or, for a specific screensaver like bubbles, %windir%\System32\Bubbles.scr /s.
- Name it “Start Screen Saver” and click Finish. Double-clicking this icon will immediately start your screen saver.
Exploring Custom and Third-Party Screen Savers
Want to go beyond the built-in options? Windows still supports the classic .scr file format for screen savers.
- Where to find them: Reputable tech sites like ScreenSavers.com have curated collections. Always download from well-known sources to avoid malware.
- How to install: In most cases, you simply right-click the .scr file you downloaded and select Install. It will then appear in your list of available screen savers.
A Critical Security Checklist
Before installing any third-party screen saver, be aware of the risks. Executable .scr files can contain malware or adware.
- Verify the Source: Only download from well-known, trusted websites.
- Scan the File: Before installing, right-click the file and scan it with your antivirus software.
- Check for Bundled Software: During installation, read every step carefully to uncheck any offers for bundled toolbars or other unwanted software.
For Administrators: Managing Settings with Group Policy
If you’re using Windows Pro, Enterprise, or Education, you can use the Local Group Policy Editor to enforce screen saver settings for all users.
- Press Win + R, type gpedit.msc, and press Enter.
- Navigate to User Configuration > Administrative Templates > Control Panel > Personalization.
- Here you will find policies like “Enable screen saver,” “Password protect the screen saver,” and “Screen saver timeout.” You can enable and configure these to prevent users from changing them.
Troubleshooting: Common Screen Saver Issues
If your screen saver refuses to start, one of these common culprits is usually to blame:
Incorrect Power Settings: Your Windows Power Plan can override screen saver settings. According to Microsoft’s official documentation, ensure your display isn’t set to turn off before your screen saver is set to begin.
A Sensitive Mouse or Peripheral: A slight vibration on your desk can cause a sensitive mouse to send an input, resetting the idle timer. Try unplugging peripherals one by one to see if one is the cause.
Active Background Applications: Some applications, particularly media players or presentation software, can prevent the screen saver from activating.
Frequently Asked Questions (FAQ)
How do I turn off my screen saver?
To disable it, simply go to the Screen Saver Settings window, select (None) from the dropdown menu, and click Apply.
Why is my screen saver not working?
The most common cause is a connected device, like a mouse or game controller, sending small inputs that prevent the computer from being truly idle. Also, check your power settings. According to Microsoft’s official documentation, certain power plans can prevent the screen saver from starting
Can I use a video as a screen saver in Windows?
Windows does not natively support using a video file as a screen saver. However, you can use trusted third-party applications to enable this functionality. Always be sure to download software from reputable sources.
Conclusion
And there you have it! In just a few minutes, you can fully customize your screen saver settings in both Windows 11 and 10. Whether you want a beautiful slideshow of family photos or a secure, password-protected screen for your office, you now have all the steps needed to make it happen. You’ve learned how to find the settings, personalize different types, and configure the most important security options.
What screen saver will you be using? Share your favorite configurations in the comments below, and don’t forget to share this guide with anyone else who could use a more personalized PC experience.
IT Security / Cyber Security Experts.
Technology Enthusiasm.
Love to read, test and write about IT, Cyber Security and Technology.
The Geek coming from the things I love and how I look.