
File Explorer is an essential tool in Windows. It helps you manage your files and folders. This guide provides comprehensive details on how to get help with File Explorer in Windows 11 and 10, from how to use it to solving common problems.
- How to Open File Explorer (Many Methods)
- Option 1: Via Search
- Option 2: Open By Right-clicking Start Menu
- Option 3: Open from taskbar
- Option 4: Open from Quick Link menu
- Option 5: Start menu left pane
- Option 6: Windows Search
- Option 7: How to open File Explorer from Run dialog
- Option 8: How to open File Explorer from app location
- Option 9: How to open File Explorer from Command Prompt
- Option 10: How to open File Explorer from PowerShell
- File Explorer Ribbons Explained
- File Explorer Keyboard Shortcuts
- Access “My Documents” in File Explorer
- Import Photos and Videos from a Phone to File Explorer
- Setup and Sync OneDrive in File Explorer
- Perform Common File Explorer Tasks
- How to Print a Document or File in File Explorer
- How to Resize Images in File Explorer
- How to Delete Photos in File Explorer or Photos App
- How to Save a File In File Explorer
- How to Change File Explorer to Thumbnail View
- How to Increase File Explorer Text Size
- How to Open File Explorer Options
- How to Enable File Explorer Preview Pane
- How to Get Help with File Explorer in Windows 10 & 11
- Advanced Tips to Get Help with File Explorer in Windows
- Solution 1: Restart File Explorer in Task Manager
- Solution 2: Manually Restart the Explorer.exe Process via Command Prompt
- Solution 3: Change Display Settings
- Solution 4: Extend Drive C: If It Is Full
- Solution 5: Create a New User Account
- Solution 6: Use Windows Troubleshooter
- Solution 7: Reset File Explorer Settings
- Solution 8: Run System File Checker (SFC) and DISM
- Solution 9: Use Windows Support and Community Forums
- Solution 10: Check for Windows Updates
- How do I search for help in Windows File Explorer?
- File Explorer Alternatives
- Conclusion
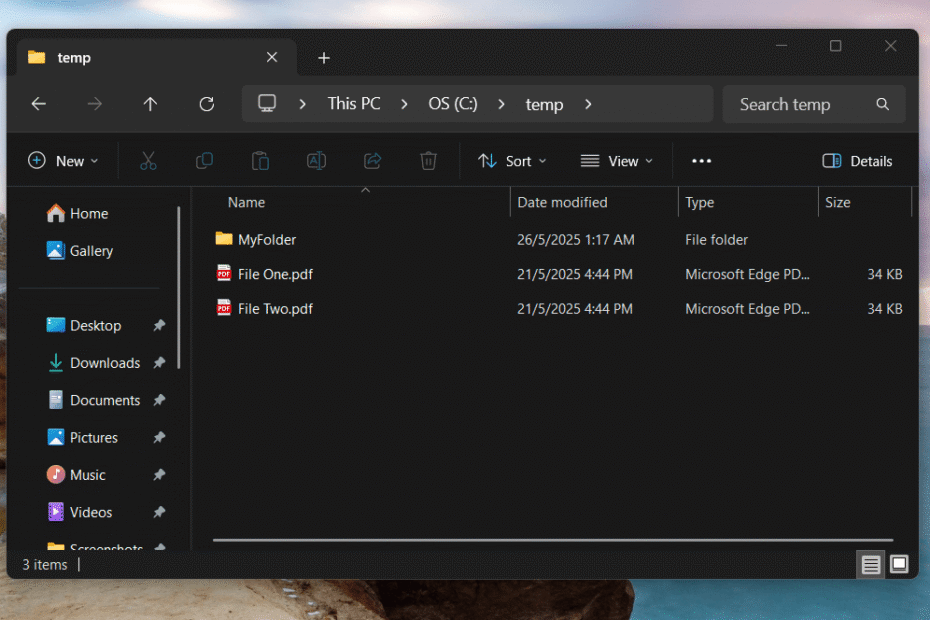
How to Open File Explorer (Many Methods)
You have many ways to open File Explorer in Windows. Choose the method that you find easiest.
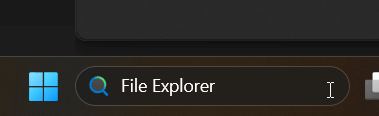
Option 1: Via Search
- Click the Search icon or Search bar on your taskbar.
- Type “File Explorer“.
- Select File Explorer from the search results.
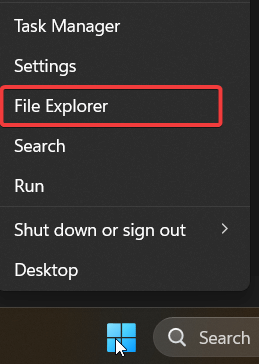
Option 2: Open By Right-clicking Start Menu
- Right-click the Start button on the taskbar.
- Select “File Explorer” from the menu that appears.
Option 3: Open from taskbar
- Look for the File Explorer icon on your taskbar. It looks like a yellow folder.
- Click the File Explorer icon to open it.
- If it is not pinned, you can search for it and then right-click to “Pin to taskbar“.
Option 4: Open from Quick Link menu
- Press the Windows key + X on your keyboard.
- This action opens the Quick Link menu.
- Select “File Explorer” from this menu.
Option 5: Start menu left pane
- Click the Start button.
- Look for the File Explorer icon in the left pane of the Start menu.
- Click the icon to open File Explorer.
- You might need to customize your Start menu to show this icon.
Option 6: Windows Search
- Press the Windows key on your keyboard to open Start.
- Start typing “File Explorer“.
- The search results will show File Explorer. Click it.
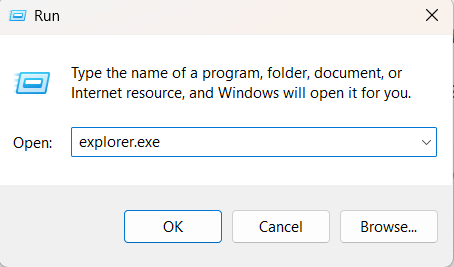
Option 7: How to open File Explorer from Run dialog
- Press the Windows key + R to open the Run dialog box.
- Type “explorer.exe” in the box.
- Click “OK” or press Enter.
Option 8: How to open File Explorer from app location
- Open the Run dialog box (Windows key + R).
- Type C:\Windows\explorer.exe and press Enter.
- This directly runs the File Explorer application from its location.
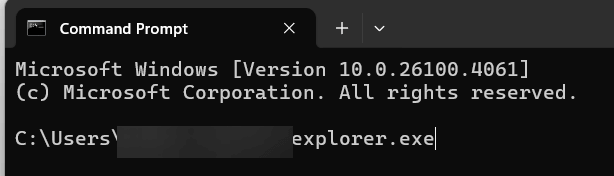
Option 9: How to open File Explorer from Command Prompt
- Open Command Prompt. You can search “cmd” in the Start menu.
- In the Command Prompt window, type explorer.exe.
- Press Enter.
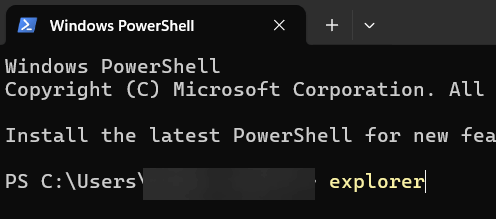
Option 10: How to open File Explorer from PowerShell
- Open PowerShell. You can search “powershell” in the Start menu.
- In the PowerShell window, type explorer.
- Press Enter.
File Explorer Ribbons Explained
File Explorer uses a ribbon interface at the top of its window. This ribbon contains common commands grouped into tabs.
File Explorer “Home” Ribbon Explained
The Home ribbon gives you access to frequent tasks:
- Clipboard: Copy, paste, cut, and copy path.
- Organize: Move to, copy to, delete, and rename files or folders.
- New: Create new folders, shortcuts, or various file types.
- Open: Open files, edit files, or view properties.
- Select: Select all, select none, or invert selection.
File Explorer “Share” Ribbon Explained
The Share ribbon helps you share files and folders:
- Send: Email selected items, zip selected items, or burn to disc.
- Share with: Share files with specific people or apps.
- Advanced security: Access advanced sharing and security settings.
File Explorer “View” Ribbon Explained
The View ribbon lets you change how files and folders appear:
- Panes: Show or hide the preview pane, details pane, or navigation pane.
- Layout: Choose icons (extra large, large, medium, small), list, details, tiles, or content view.
- Current view: Sort by, group by, add columns, or size columns to fit.
- Show/hide: Toggle item check boxes, file name extensions, hidden items, and selected items.
- Options: Open Folder Options for more settings.
File Explorer Keyboard Shortcuts
Keyboard shortcuts can speed up your work in File Explorer. Here are some useful ones:
| Shortcut | Function |
|---|---|
| Alt + P | Show/hide the Preview Pane |
| Ctrl + N | Open a new File Explorer window |
| Ctrl + W | Close the current File Explorer window |
| Ctrl + E or Ctrl + F | Select the search box |
| Ctrl + Shift + N | Create a new folder |
| Alt + Left Arrow | Go to the previous folder |
| Alt + Right Arrow | Go to the next folder |
| Alt + Up Arrow | Go to the parent folder |
| F2 | Rename the selected item |
| F11 | Toggle full-screen mode |
Customize “Quick access” in File Explorer
Quick access shows your frequently used folders and recent files. You can customize it.
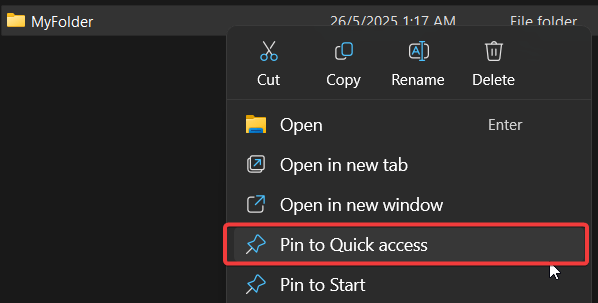
How to “Pin” File Explorer Items to “Quick access”
- Open File Explorer.
- Find the folder you want to pin.
- Right-click the folder.
- Select “Pin to Quick access.” The folder will now appear in the Quick access list.
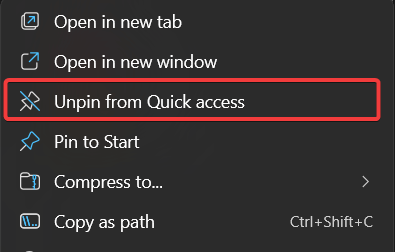
How to “Unpin” File Explorer Items from “Quick access”
- Open File Explorer.
- In the Quick access list, find the item you want to unpin.
- Right-click the pinned item.
- Select “Unpin from Quick access.”
How to Remove “Frequent Folders” and/or “Recent Files” from “Quick access”
- Open File Explorer.
- Click the “…” tab on the ribbon.
- Click “Options” (it might be an icon or text on the far right).
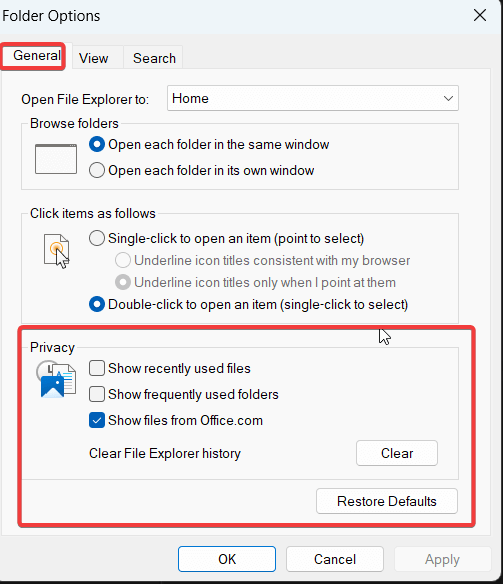
- In the Folder Options window, under the “General” tab, find the “Privacy” section.
- Uncheck “Show recently used files in Quick access.”
- Uncheck “Show frequently used folders in Quick access.”
- Click “Clear” next to “Clear File Explorer history” to remove current items.
- Click “Apply” then “OK.”
Access “My Documents” in File Explorer
Your “Documents” folder is a common place to store personal files.
- Open File Explorer.
- In the navigation pane on the left, look for “Documents” or “My Documents.” It is often listed under “This PC” or “Quick access.”
- Click “Documents” to open the folder.
Import Photos and Videos from a Phone to File Explorer
You can transfer photos and videos from your phone to your Windows PC using File Explorer.
How to Connect Your Android or iPhone to Your PC
- Android: Connect your Android phone to your PC using a USB cable. On your phone, you may need to change the USB connection mode to “File Transfer (MTP)” or “Transfer photos (PTP).”
- iPhone: Connect your iPhone to your PC using a USB cable. If prompted on your iPhone, tap “Trust” or “Allow” to let your PC access your photos and videos. You may need iTunes installed on your PC.
How to Import Photos or Videos from Your Phone
- After connecting your phone, open File Explorer.
- Your phone should appear as a device under “This PC” or “Devices and drives.”
- Double-click your phone’s icon.
- Open the “Internal storage” or “SD card” folder.
- Find the folder containing your photos and videos. This is often “DCIM” (Digital Camera Images).
- Select the photos and videos you want to import.
- Copy them (Ctrl+C).
- Go to the folder on your PC where you want to save them (e.g., “Pictures”).
- Paste them (Ctrl+V).
- Alternatively, Windows Photos app can also import photos. Right-click your phone in File Explorer and select “Import pictures and videos.”
Setup and Sync OneDrive in File Explorer
OneDrive is Microsoft’s cloud storage service. You can integrate it with File Explorer for easy access and syncing.
- If OneDrive is not set up, search for “OneDrive” in the Start menu and open the app.
- Sign in with your Microsoft account. If you do not have one, you can create one.
- Follow the on-screen instructions to choose your OneDrive folder location and select which folders to sync.
- Once set up, a OneDrive folder will appear in File Explorer’s navigation pane.
- Files you add to this folder will automatically sync to the cloud and your other devices.
Perform Common File Explorer Tasks
File Explorer allows you to manage your files effectively. Here are some common tasks.
How to Print a Document or File in File Explorer
- Open File Explorer and find the document or file you want to print.
- Right-click the file.
- Select “Print” from the context menu.
- This option is available for file types that support direct printing (like .txt, .pdf if a reader is set as default, image files). Otherwise, you may need to open the file in its application and print from there.
How to Resize Images in File Explorer
Windows does not have a built-in direct resize option in File Explorer’s right-click menu for all versions.
- Using Paint (or Paint 3D):
- Right-click the image file in File Explorer.
- Select “Open with” then choose “Paint” or “Paint 3D.”
- In Paint, use the “Resize” option (on the Home tab).
- Adjust the size by percentage or pixels.
- Save the resized image.
- Using Microsoft PowerToys (Advanced):
- Install Microsoft PowerToys.
- Enable the “Image Resizer” utility.
- Right-click an image file (or multiple selected images) in File Explorer.
- Select “Resize pictures.”
- Choose a predefined size or enter a custom size. Click “Resize.”
How to Delete Photos in File Explorer or Photos App
- In File Explorer:
- Open File Explorer and find the photos you want to delete.
- Select the photo(s).
- Press the Delete key on your keyboard, or right-click and select “Delete.”
- Deleted files usually go to the Recycle Bin.
- In Photos App:
- Open the Photos app.
- Find and select the photo(s) you want to delete.
- Click the “Delete” icon (often a trash can) or right-click and select “Delete.”
How to Save a File In File Explorer
File Explorer itself does not save files; applications do. When you save a file from an application (like Word or Notepad):
- In the application, choose “File” > “Save” or “File” > “Save As.”
- A “Save As” dialog box will appear. This dialog box is a version of File Explorer.
- Choose the folder where you want to save the file.
- Enter a name for the file in the “File name” box.
- Click “Save.”
How to Change File Explorer to Thumbnail View
- Open File Explorer.
- Go to the “View” tab on the ribbon.
- In the “Layout” section, select “Large icons,” “Extra large icons,” or “Medium icons.” These options show thumbnails for image and video files.
How to Increase File Explorer Text Size
- Windows scales text size system-wide, which affects File Explorer.
- Right-click on your desktop and select “Display settings.”
- Under “Scale and layout,” find the “Change the size of text, apps, and other items” dropdown menu.
- Select a larger percentage (e.g., 125%, 150%). This will make text larger across Windows, including File Explorer.
- You may need to sign out and sign back in for changes to apply fully.
- For more granular control over only text size (not all elements), search “Make text size bigger” in Windows Settings.
How to Open File Explorer Options
- Open File Explorer.
- Click the “View” tab on the ribbon.
- On the far right of the View ribbon, click “Options.” (In some Windows versions, it might be an icon, or under a “…” menu).
- This opens the “Folder Options” window, where you can change many File Explorer settings.
How to Enable File Explorer Preview Pane
- Open File Explorer.
- Click the “View” tab on the ribbon.
- In the “Panes” group, click “Preview pane.”
- A new pane will appear on the right side of File Explorer. When you select a file (like an image, PDF, or text document), you will see its content in this pane.
How to Get Help with File Explorer in Windows 10 & 11
If File Explorer causes problems in Windows 11, try these suggestions.
How do I get File Explorer back to normal in Windows 10 & 11?
If File Explorer looks different or behaves strangely, try:
- Restarting File Explorer: See “Restart File Explorer in Task Manager” below.
- Checking View Options: Go to “View” > “Layout” and ensure your preferred layout is selected. Check “View” > “Show/hide options“.
- Resetting Folder Views: In File Explorer Options (View > Options), click “View” tab, then “Reset Folders,” then “Yes.” Then click “Restore Defaults.”
- Checking for Windows Updates: Updates can fix known issues.
File Explorer Not Responding or Freezing
When File Explorer stops responding or freezes:
- Restart File Explorer: This is often the quickest fix. See “Restart File Explorer in Task Manager” below.
- Check for problematic extensions: Third-party software can add shell extensions that cause issues.
- Run System File Checker: Corrupt system files can cause problems. See “Run System File Checker (SFC) and DISM” below.
File Explorer Keeps Crashing
If File Explorer crashes repeatedly:
- Restart File Explorer.
- Update Windows and drivers: Outdated software or drivers can cause instability.
- Perform a clean boot: This helps identify if third-party software is the cause. Search for “msconfig,” go to Services, hide Microsoft services, and disable the rest. Then check Task Manager’s Startup apps.
- Check system files: Use SFC and DISM tools.
Advanced Tips to Get Help with File Explorer in Windows
If basic troubleshooting does not work, these advanced tips might help fix File Explorer issues.
Solution 1: Restart File Explorer in Task Manager
- Press Ctrl + Shift + Esc to open Task Manager.
- In the “Processes” tab, find “Windows Explorer.”
- Right-click “Windows Explorer” and select “Restart.”
- Your taskbar and desktop icons might disappear briefly and then reappear.
Solution 2: Manually Restart the Explorer.exe Process via Command Prompt
- Open Command Prompt as an administrator. Search “cmd,” right-click Command Prompt, and select “Run as administrator.”
- Type taskkill /f /im explorer.exe and press Enter. This will close File Explorer and your desktop.
- Type start explorer.exe and press Enter. This will restart File Explorer.
Solution 3: Change Display Settings
Incorrect or very high display resolutions or scaling settings can sometimes affect File Explorer’s performance.
- Right-click your desktop and select “Display settings.”
- Try a different scaling percentage (e.g., 100% or 125%).
- Try a common screen resolution for your monitor.
- If you use multiple monitors, try using only one to see if the issue persists.
Solution 4: Extend Drive C: If It Is Full
A full system drive (usually C:) can cause many problems, including File Explorer issues.
- Open File Explorer, click “This PC.”
- Check the free space on your Local Disk (C:).
- If it is low, free up space. Use Disk Cleanup (search “Disk Cleanup” in Start). Uninstall unused programs. Move large files to another drive.
- You can use Disk Management to extend C: drive if there is unallocated space next to it. Right-click Start, select “Disk Management.”
Solution 5: Create a New User Account
A corrupted user profile can cause File Explorer problems.
- Go to “Settings” > “Accounts” > “Family & other users“.
- Click “Add someone else to this PC” (or “Add account“).
- Follow prompts to create a new local user account.
- Sign out of your current account and sign in to the new account.
- Check if File Explorer works correctly in the new account. If it does, your old user profile might be the issue. You can then transfer your files to the new account.
Solution 6: Use Windows Troubleshooter
Windows includes troubleshooters that can automatically find and fix some common problems.
- Go to “Settings” > “System” > “Troubleshoot” (or Settings > Update & Security > Troubleshoot in older Windows versions).
- Click “Other troubleshooters” or “Additional troubleshooters.”
- Look for troubleshooters related to “Search and Indexing” or “System Maintenance.” Running these might help File Explorer issues.
Solution 7: Reset File Explorer Settings
You can reset File Explorer settings to their defaults.
- Open File Explorer Options (View tab > Options).
- On the “General” tab, click “Restore Defaults.”
- Go to the “View” tab, click “Restore Defaults.”
- Click “Apply,” then “OK.”
- For a more thorough reset, you might need to edit the registry (advanced users only, back up registry first).
Solution 8: Run System File Checker (SFC) and DISM
These tools check for and repair corrupted Windows system files.
- Open Command Prompt as an administrator.
- Type sfc /scannow and press Enter. Wait for the scan to complete.
- If SFC finds issues but cannot fix them, or if problems persist, run DISM.
- In the same Command Prompt, type DISM /Online /Cleanup-Image /RestoreHealth and press Enter. Wait for this process to complete.
- Restart your PC after the scans.
Solution 9: Use Windows Support and Community Forums
If you still need help:
- Use the “Get Help” app in Windows (search “Get Help” in Start).
- Visit the official Microsoft Support website.
- Search for solutions or ask questions in Microsoft Community forums or other reputable tech forums.
Solution 10: Check for Windows Updates
Ensure your Windows operating system is up to date.
- Go to “Settings” > “Windows Update” (or Settings > Update & Security > Windows Update).
- Click “Check for updates.”
- Install any available updates. Restart your PC if required. Updates often include fixes for known issues.
How do I search for help in Windows File Explorer?
File Explorer itself does not have a dedicated help search function that connects to online resources directly within its window like some older applications.
- To find specific options or settings within File Explorer, use its interface: the ribbons (Home, Share, View) and the “Options” menu.
- For general help or troubleshooting, use the Windows Search bar on your taskbar. Type your question or keywords like “File Explorer help” or “fix File Explorer crash.”
- You can also use the “Get Help” app included with Windows. Search for “Get Help” in the Start menu.
File Explorer Alternatives
If you need different features or find File Explorer unsuitable for specific tasks, you can consider alternative file manager applications. Some popular third-party file managers include:
These alternatives often offer features like dual-pane views, advanced search capabilities, and more customization options.
Frequently Asked Questions (FAQs)
How do I get File Explorer back to its default settings?
The easiest way is through Folder Options. Open File Explorer, click the three dots (…) > Options. On the View tab, click the “Restore Defaults” button. This will reset things like folder views and what panes are visible.
Why can’t I see thumbnails for my images?
This is usually a setting that has been accidentally changed. Go to File Explorer Options (as described above), click the View tab, and make sure the box for “Always show icons, never thumbnails” is unchecked.
How do I change the starting folder when I open File Explorer?
By default, File Explorer opens to Quick Access. To change this, go to File Explorer Options. At the top of the General tab, use the dropdown menu next to “Open File Explorer to:” and change it from “Quick access” to “This PC.”
Conclusion
That’ all about how to get help with File Explorer in Windows.
Whether it’s sluggish performance, unexpected crashes, or simply not knowing how to find what you need, remember that solutions are within reach.
From built-in troubleshooters and system file checks to seeking community advice or leveraging Microsoft’s official support channels, you’re now equipped with several avenues to get File Explorer back on track.
By proactively addressing issues and knowing where to turn for help, you can ensure smoother navigation, better organization, and a more productive digital life on your Windows PC.
IT Security / Cyber Security Experts.
Technology Enthusiasm.
Love to read, test and write about IT, Cyber Security and Technology.
The Geek coming from the things I love and how I look.