
Tired of manually typing dozens of email addresses for your project team, family, or club? This step-by-step guide will teach you how to create a distribution list in outlook, the ultimate solution for efficient communication.
You will learn how to create and manage distribution lists for every version of outlook, helping you send group emails and streamline your workflow instantly.
- What is a Distribution List (or Contact Group)?
- How to Create a Distribution List in New Outlook for Windows
- How to Create Distribution Lists in Classic Outlook (Outlook 365 / 2021 / 2019)
- How to Create a Distribution List in Outlook on the Web
- How to Create a Distribution List in Outlook for Mac
- Advanced Method: Create a Contact Group from an Excel or CSV File
- How to Create and Manage Your New Outlook Distribution List
- Distribution List Best Practices for Managing Outlook Distribution Lists
- Troubleshooting Common Issues
- Groups and Distribution Lists: What’s the Difference with a Microsoft 365 Group?
- Frequently Asked Questions (FAQ)
- Conclusion
What is a Distribution List (or Contact Group)?
First, let’s clarify the terminology. What Microsoft once called a “Distribution List” or “distribution group” is now primarily referred to as a contact group in modern versions of Outlook.
Understanding the relationship between distribution lists and contact groups is key. Both terms mean the same thing: a collection of email addresses saved under a single group name.
When you send email to the contact group, everyone on that email distribution list receives it. It’s a simple but incredibly powerful tool for managing your outlook distribution.
Pro-Tip: In the classic outlook desktop app, you can use the keyboard shortcut Ctrl+Shift+L from anywhere in the application to immediately open the new contact group window.
How to Create a Distribution List in New Outlook for Windows
The new outlook features a modern, simplified interface. Follow these steps to create a distribution list with ease.
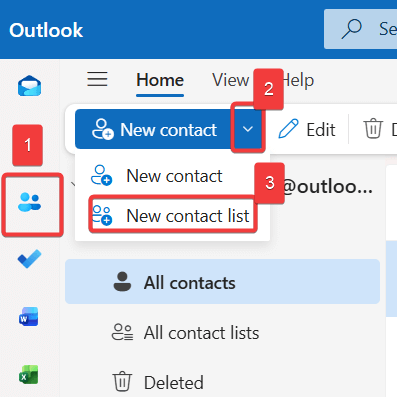
- Navigate to the People Hub. First, look to the navigation pane on the left side of the Outlook window and click on the People icon.
- Initiate a New Contact Group. Next, ensure you are on the Home tab in the top ribbon. From there, click the New Contact List button.
- Provide a Name for Your Group. A new window will appear. In the “Name” field, type a descriptive name for your group (e.g., “Project Phoenix Team” or “Weekly Book Club”).
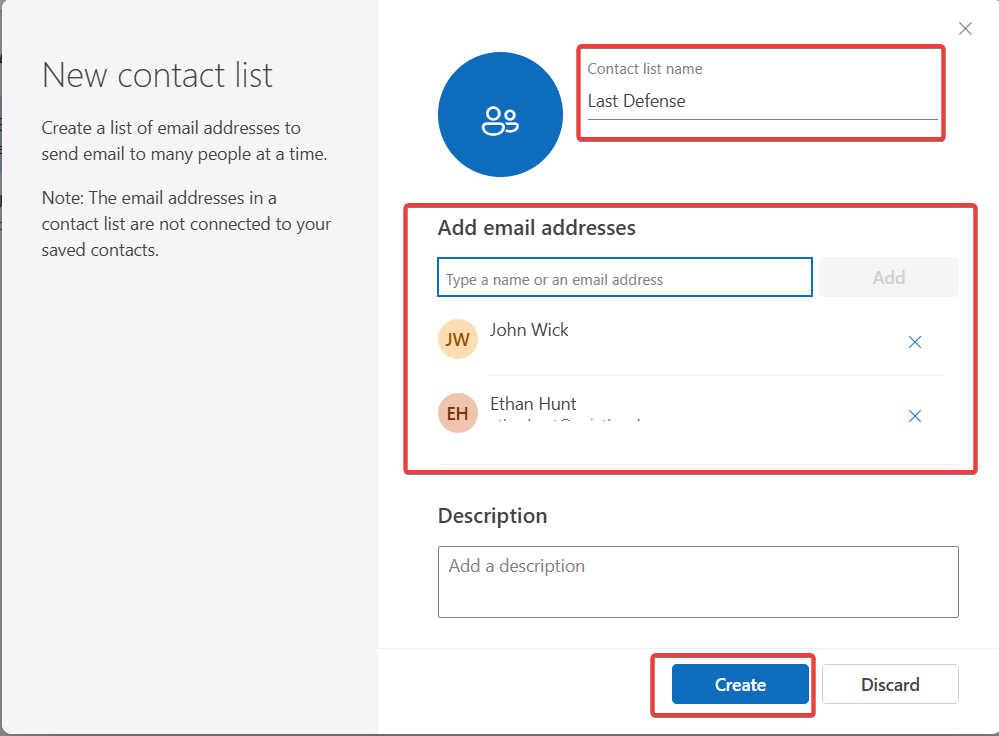
- Add Members to Your Contact Group. In the “Add members” section, begin typing the names or email addresses of the people you want to add to your group. Outlook will suggest contacts from your address book. Select the correct contact and click Add. Repeat this for everyone you want in the contact list.
- Save Your Group. Once you’ve added all the distribution list members, click the Create button. Your new contact group is now ready to use.
How to Create Distribution Lists in Classic Outlook (Outlook 365 / 2021 / 2019)
If you’re using the more traditional version of outlook for windows with the classic ribbon, the process to create distribution lists is just as straightforward. This applies to most 365 versions.
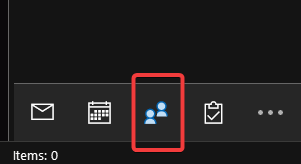
- Open the People Section. To begin, click the People icon located in the bottom-left corner of the navigation pane.
- Select New Contact Group. On the Home tab at the top, find and click the New Contact Group button.

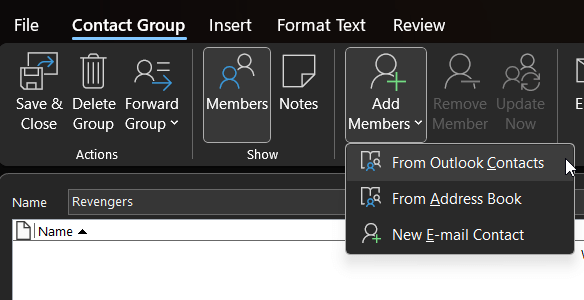
- Name the Group and Add Members. In the contact group in outlook window, give your group a name. Then, click Add Members and choose to include contacts from your outlook contacts, Global Address List, or create a new email contact.
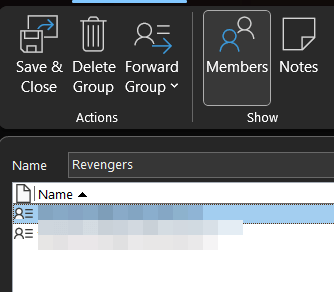
- Save the Group. After adding all your members, click Save & Close.
Now, you will see list of members of the distribution list.
How to Create a Distribution List in Outlook on the Web
For those who use outlook on the web, creating a contact list is simple. This email group will sync across your devices.
- Go to the People Page. From the main mail view, find the People icon on the left-hand navigation pane and click it.
- Create a New Contact List. In the left pane, click the dropdown next to All contact lists and select new contact list.
- Name the List and Add Contacts. Type a name for your list in the top field. In the “Add email addresses” box below, start typing the names of your contacts and select them as they appear.
- Save It. Once finished, click the Create button.
How to Create a Distribution List in Outlook for Mac
Using outlook for mac, users can also easily create an email group with just a few clicks. This is how you create a group in outlook on this platform.
- Switch to People View. In Outlook for Mac, click the People icon at the bottom of the navigation pane.
- Create the Group. On the Home tab, click New Contact List.
- Add Members and Name the List. A new window will open. Double-click “Untitled List” to rename it. Then, drag and drop contacts from your address book into the main window or use the ‘+’ button to add new members manually.
- Save Your Work. Finally, click Save & Close.
Advanced Method: Create a Contact Group from an Excel or CSV File
For large lists, adding members one by one is impractical. While Outlook can’t directly create a group from an Excel file, you can achieve this with a simple two-phase process.
Phase 1: Import Contacts from a CSV File
- Prepare Your File: Ensure your contact list is saved as a .CSV file with column headers like “First Name,” “Last Name,” and “E-mail Address.”
- Start the Import Wizard: In Outlook, go to File > Open & Export > Import/Export.
- Choose Import Source: Select Import from another program or file and click Next.
- Select File Type: Choose Comma Separated Values and click Next.
- Upload and Import: Browse for your .CSV file, choose how to handle duplicates, and select your main Contacts folder as the destination. Follow the prompts to map the columns and finish the import.
Phase 2: Create the Contact Group
- Once the contacts are in your main Outlook address book, follow the steps in the sections above to create a new contact group.
- When you click Add Members, choose From Outlook Contacts. You can now easily select all the new contact data you just imported to form your outlook distribution list.
How to Create and Manage Your New Outlook Distribution List
Creating the group or distribution list is just the start. Now we’ll show you how to create the best workflow to manage a distribution list, send email, and use it for meeting invites.
How to Send an Email to a Contact Group
Simply open a new email message.
In the To: field, begin typing the name of your contact group. Outlook’s autocomplete feature will suggest the outlook group; select it and press Enter.
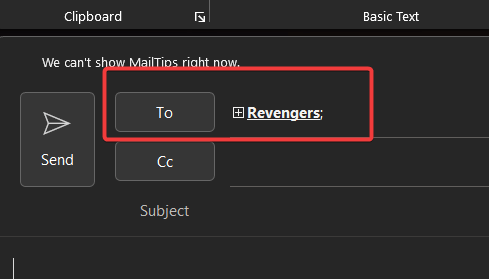
A new email addressed to every member of the group is now ready.
How to Use a Contact Group for Meeting Invitations
The power of distribution lists extends beyond sending a simple outlook email. To schedule a meeting with your entire group:
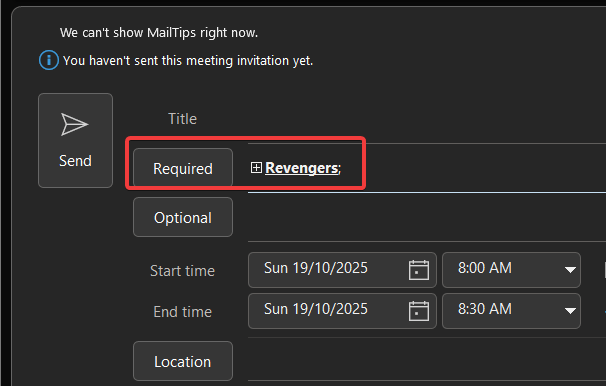
- Navigate to your Outlook Calendar.
- Click New Meeting or New Appointment.
- In the Required or Attendees field, simply type the name of your Contact Group, just as you would in an email.
- Outlook will add every member of the group to the invitation, saving you the effort of adding them individually.
Pro-Tip: Expanding the Group Before You Send
Have you ever needed to send an email to a group but exclude one person for that specific message? You don’t need to edit your distribution list permanently.
- Type the Contact Group name in the To: field.
- In most desktop versions of Outlook, a small [+] icon will appear to the left of the group name. Click this icon.
- Outlook will expand the group, replacing the group name with the individual email addresses of every member.
- You can now manually delete any recipient from the “To:” field before you send the email, without affecting the saved contact group. This is a great way to manage distribution lists in outlook with flexibility.
How to Edit Distribution Lists in Outlook (Add or Remove Members)
To modify your group, navigate to your People or Contacts section. Find the specific outlook distribution list you want to change and double-click it to open the management window. Here you can use the Add Members button to add a new contact or select existing members and click the Remove Member button. Remember to click Save & Close to apply the changes to your distribution lists.
How to Delete a Contact Group
If a group is no longer needed, simply find it in your contact list, right-click on it, and select Delete Group from the context menu. This action only deletes the group itself, not the individual contacts within it from your address book.
Distribution List Best Practices for Managing Outlook Distribution Lists
- Use Clear Naming Conventions: Name your groups descriptively (e.g., “Marketing Dept Heads” instead of just “Marketing”). This prevents confusion when you have multiple lists.
- Use BCC for Privacy: When sending newsletters or emails to a large group of people who don’t know each other, always put the contact group name in the BCC: (Blind Carbon Copy) field. This protects the privacy of your recipients’ email addresses, which is crucial for a large mailing list.
- Update Your Distribution Lists Regularly: People change roles and companies. To ensure deliverability and relevance, audit your large distribution lists quarterly to remove outdated contacts.
- Keep a Master List: For very large lists managed via CSV, keep the Excel file as your master source. Make changes there, and periodically re-import to keep your Outlook contacts fresh.
Troubleshooting Common Issues
- Problem: My Contact Group isn’t showing up in the “To:” field.
- Solution: Outlook’s autocomplete cache can sometimes get corrupted. Try typing the full name of the group exactly as you saved it. If that fails, go to File > Options > Mail, scroll to the “Send messages” section, and click the Empty Auto-Complete List button.
- Problem: A member of the group says they are not receiving the emails.
- Solution: First, have them check their Junk or Spam folder. If it’s not there, open the Contact Group, double-check that their email address is spelled correctly, and ensure there are no extra spaces.
- Problem: The “New Contact Group” button is greyed out.
- Solution: This typically happens if you are not in a contact-enabled folder. Ensure you have clicked on the People icon and have selected one of your primary “Contacts” folders (e.g., Contacts under “My Contacts”).
Groups and Distribution Lists: What’s the Difference with a Microsoft 365 Group?
It’s important not to confuse a personal contact group with a microsoft 365 group. While a contact list is simply an email list, microsoft 365 groups are a far more powerful collaboration tool. They include a shared inbox, a group calendar, and a SharePoint document library. Understanding this difference is key for anyone using microsoft 365.
Frequently Asked Questions (FAQ)
A: The easiest way is to open a new email, attach the contact group by dragging it from your contacts into the email body, and send it to the recipient. They can then drag the attachment into their own contacts to save it.
A: For most personal Outlook accounts, the number of members in a single contact group is very high, but your email provider may have daily sending limits. For business accounts, your organization’s administrator sets the policies.
A: Yes. As covered in our Pro-Tip section, you can expand the contact group in the “To:” field by clicking the [+] icon next to it. This will show all the individual email addresses, allowing you to delete one or more before sending the message.
A: As detailed in our “Advanced Method” section, you cannot directly create a contact group from an Excel file. However, you can first import the Excel contacts into your main outlook contact folder and then add them to a new contact list from there. This is the recommended way to create a large email distribution list in outlook.
A: Outlook distribution lists are useful because they save a tremendous amount of time and reduce the chance of errors. Instead of typing many email addresses for a group email, you only need to type the group name. This is perfect for project teams, committees, or any group you communicate with regularly. Creating a distribution list in outlook 365 is one of the best productivity hacks.
Conclusion
Mastering how to create a distribution list in outlook is a fundamental skill for anyone looking to make their email communication more efficient.
These steps to create distribution lists will help you send group emails with ease. By following this guide for any version of outlook, leveraging advanced techniques, and applying best practices for your outlook distribution list, you can eliminate repetitive tasks.
You now know how to create distribution lists that streamline your workflow. We hope this guide on managing your outlook distribution was helpful; feel free to share it with colleagues or leave a comment below.
IT Security / Cyber Security Experts.
Technology Enthusiasm.
Love to read, test and write about IT, Cyber Security and Technology.
The Geek coming from the things I love and how I look.