
Learning how to install software on my computer can feel daunting, but it’s a fundamental skill that unlocks your PC’s true potential.
This guide will walk you through the process safely and confidently, ensuring you avoid common pitfalls like unwanted adware and viruses from the start.
Before You Begin: 3 Essential Pre-Installation Checks
Before you download anything, taking a few preparatory steps is crucial. This ensures the software will work correctly and that your computer remains secure.
1. Check System Requirements (Compatibility)
First, always confirm that your computer meets the software’s system requirements.
You can usually find these on the software’s official website under a “Specs” or “Requirements” section. Look for details like:
- Operating System: (e.g., Windows 11, Windows 10)
- Processor (CPU): (e.g., Intel i5, AMD Ryzen 5)
- Memory (RAM): (e.g., 8GB, 16GB)
- Available Disk Space
2. Why You Should Only Download from Official Sources
It is critically important to download software directly from the developer’s official website or the Microsoft Store.
Third-party download sites often bundle installers with adware, spyware, or even malware.
Therefore, always find the original source to protect your system.
3. Recommended: Create a System Restore Point
Finally, creating a System Restore Point is like making a quick backup of your system’s current state.
If an installation goes wrong, you can revert your computer to the point before the software was installed.
You can learn how to do this on Microsoft’s official support page.
Understanding Common Installer File Types
You’ll typically encounter a few different file types. Here’s a quick rundown:
- .EXE (Executable file): This is the most common type. You just double-click it to start the installation wizard.
- .MSI (Microsoft Installer): Similar to an .exe, this file type is often used for software in corporate environments but is also common for general programs.
- .ZIP (Zipped folder): Some software comes in a compressed .zip folder. You will need to right-click it and select “Extract All…” before you can find the .exe or .msi installer file inside.
How to Install Software on My Computer
Method 1: Installing Software from a Downloaded File (The Most Common Way)
This is the traditional method for installing most desktop programs. The downloaded file is usually an executable (.exe) or Microsoft Installer (.msi) file.
Step 1: Finding and Downloading the Installer
Navigate to the official website of the software you want. Locate the “Download” button and click it to save the installation file to your computer.
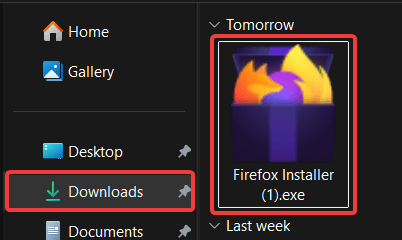
Step 2: Locating the File in Your ‘Downloads’ Folder
Once the download is complete, open your File Explorer and go to the Downloads folder. You should see the file you just downloaded. For example purposes, let’s try to install Firefox. (e.g., Firefox Installer.exe).
Step 3: Running the Installer and Granting Permissions
Double-click the downloaded file to begin the installation. At this point, Windows User Account Control (UAC) will likely display a pop-up asking, “Do you want to allow this app to make changes to your device?”
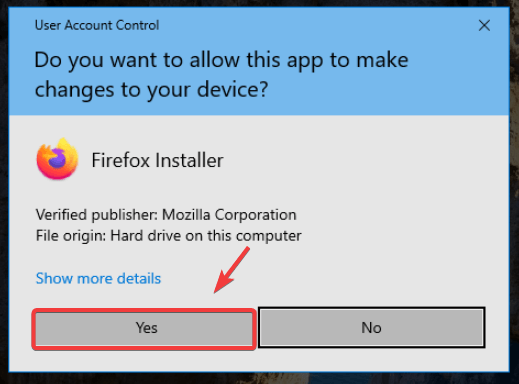
This is a critical security feature designed to prevent unauthorized software from making changes to your computer. If you trust the software publisher, click Yes.
Step 4: Navigating the Installation Wizard
You will now see a setup wizard that guides you through the installation. Pay close attention to each screen:
- License Agreement: You must accept this to proceed.
Pro Tip: Understanding Software Licenses. The license agreement you accept determines how you can use the software. Common types include Freeware (completely free to use), Shareware (free to try for a limited time, then pay), and Open Source (free to use, modify, and distribute).
- Destination Folder: This is where the program will be installed. The default location is usually fine.
- Custom vs. Typical Installation: If given the option, select Custom. This allows you to see and uncheck any boxes that offer to install bundled software, toolbars, or other unwanted programs.
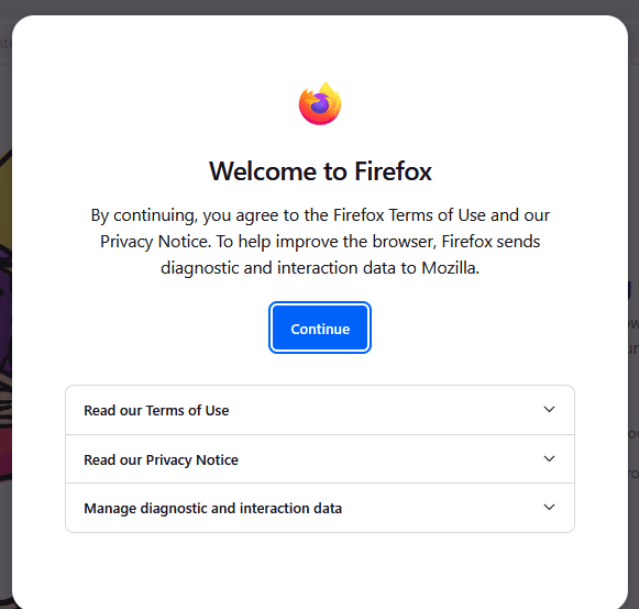
Step 5: Completing the Installation and Launching the Program
After making your selections, click Install. Once the process is finished, click Finish. You can now find the new program in your Start Menu and launch it.
Method 2: Installing Apps from the Microsoft Store
For many modern applications, using the Microsoft Store is a simpler and more secure method. Apps from the Store are vetted by Microsoft for security.
Step 1: Opening the Microsoft Store
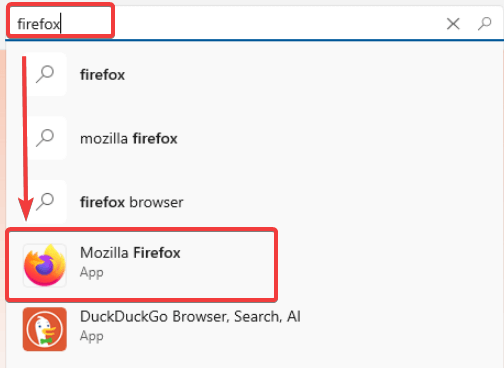
Click the Start Menu and type “Microsoft Store,” then select the app to open it.
Step 2: Searching for and Selecting an App
Use the search bar at the top to find the app you want. Again, we will use Firefox as example. (Side note: I’m not promoting Firefox. Just coincidently think of it as example)
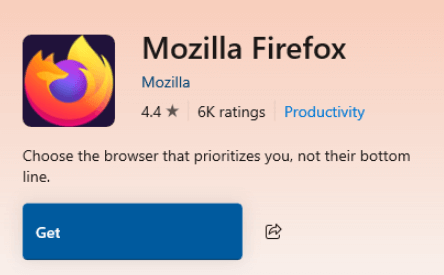
Step 3: Clicking ‘Get’ or ‘Install’
On the app’s page, simply click the Get or Install button. The app will automatically download and install without any further steps. It will then appear in your Start Menu.
An Alternative: Using Portable Apps (No Installation Needed)
For users who want to avoid cluttering their system or want to run an app from a USB drive, portable apps are a fantastic option. These are self-contained programs that don’t need to be installed.
- What are they? A portable app runs directly from its folder. All its settings and files are saved within that folder, leaving no trace on your main system.
- Why use them? They are perfect for testing new software or for carrying your favorite programs with you on a flash drive to use on any Windows PC.
- Where to find them? A trusted source for a large collection of portable apps is PortableApps.com.
Method 3: For Power Users – Installing Multiple Programs at Once
If you’re setting up a new computer, installing every application one-by-one is time-consuming. Services like Ninite streamline this process.
- Go to the Ninite website.
- Select the checkboxes for all the programs you want (e.g., Chrome, VLC, 7-Zip).
- Click “Get Your Ninite.”
- This downloads a single, custom installer file. Run this one file, and it will automatically install all the selected applications for you, declining any bundled adware.
Keeping Your Software Updated
Installing software is not a one-time event. Developers regularly release updates to fix bugs, add features, and, most importantly, patch security vulnerabilities.
- In-App Updates: Most programs will notify you when an update is available. Always install these promptly.
- Microsoft Store: Apps installed from the Store are typically updated automatically.
- Check Manually: If you’re unsure, you can usually find an “About” or “Check for Updates” option within the program’s menu.
Troubleshooting Common Installation Problems
Sometimes, things don’t go as planned. Here are a few common issues and their solutions:
- “This app can’t run on your PC.” This usually means you downloaded the wrong version. For example, you might have downloaded a 64-bit program for a 32-bit version of Windows. Go back to the website and find the correct version.
- “Not enough free disk space.” The installer has determined you don’t have enough room. You will need to free up space on your hard drive by deleting old files or uninstalling other programs.
- The installer is blocked by antivirus software. Sometimes, security software can be overly cautious. If you are 100% certain the file is from an official source, you may need to temporarily disable your antivirus to run the installation. Remember to re-enable it immediately after.
A Critical Follow-Up: How to Safely Uninstall Software
Just as important as knowing how to install software is knowing how to remove it properly. Simply deleting a program’s folder can leave behind files and registry entries that slow down your computer.
- Go to Settings > Apps > Apps & features.
- Scroll through the list to find the program you want to remove.
- Click the three dots next to the program name and select Uninstall.
- Follow the on-screen prompts to complete the removal.
Frequently Asked Questions (FAQ)
Q: Is it safe to install software from any website?
A: No. You should only download software from the official developer’s website or the Microsoft Store. Unofficial sites can be a source of malware and viruses.
Q: What is the difference between a 32-bit and 64-bit version?
A: This refers to your computer’s architecture. Most modern PCs are 64-bit, which allows them to use more RAM and run faster. If you’re unsure, your system can still run 32-bit software, but it’s always best to choose the 64-bit version if available for your 64-bit PC.
Q: My computer says “Windows protected your PC.” What should I do?
A: This is the Windows Defender SmartScreen warning. If you have downloaded the file from an official, trusted source, you can click “More info” and then “Run anyway.” If you have any doubts, do not proceed.
Conclusion: You’re Ready to Go!
You now have all the knowledge you need for the common question of how to install software on my computer.
By following these steps—checking requirements, using official sources, and carefully navigating installation wizards—you can confidently manage your PC’s applications while keeping it secure and running smoothly. The most important takeaway is to always prioritize safety.
What software are you planning to install first? Share your thoughts in the comments below
IT Security / Cyber Security Experts.
Technology Enthusiasm.
Love to read, test and write about IT, Cyber Security and Technology.
The Geek coming from the things I love and how I look.