
Snipping Tool helps you to screenshots on Windows. You can select parts of your screen or the entire screen.
This tool provides simple ways to take and edit screenshots.
Many Windows users find Snipping Tool very useful for work and personal tasks on their PC. This guide explains how to use this tool effectively.
How do I get to snipping tools?
Windows provides the Snipping Tool for screen captures. You can open Snipping Tool in several ways.
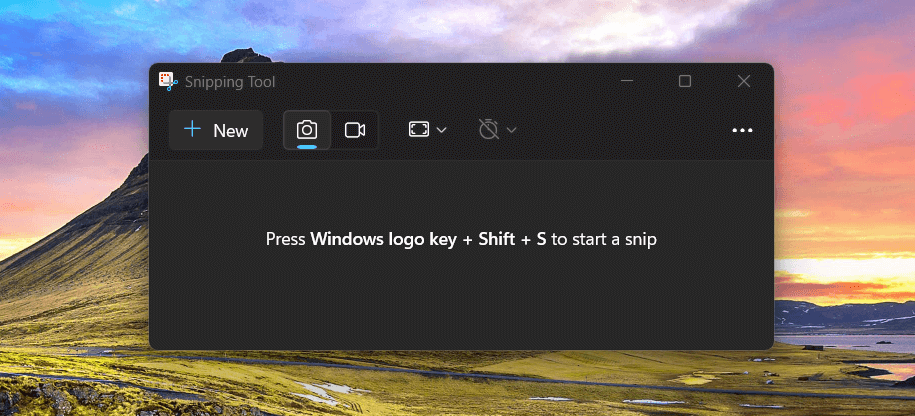
- Press the Windows + Shift + S keys simultaneously. This keyboard shortcut directly activates the snipping overlay.
- Search for “Snipping Tool” in the Windows search bar. Select the app from the results. You can also pin it to your taskbar for quick access.
Choosing Your Capture Mode
The Snipping Tool bar appears after you press Windows + Shift + S. It presents several capture mode options.
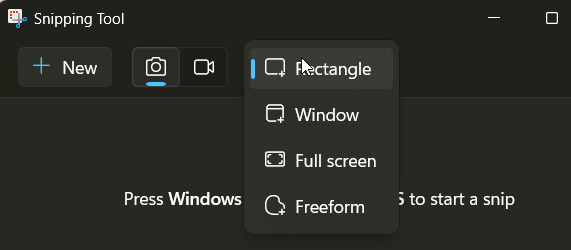
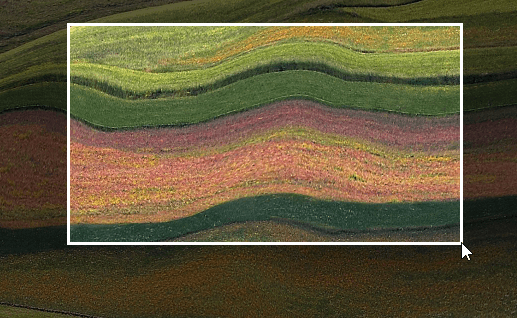
- Rectangular Snip: You drag your mouse cursor to select a rectangular area. This is often the default mode.
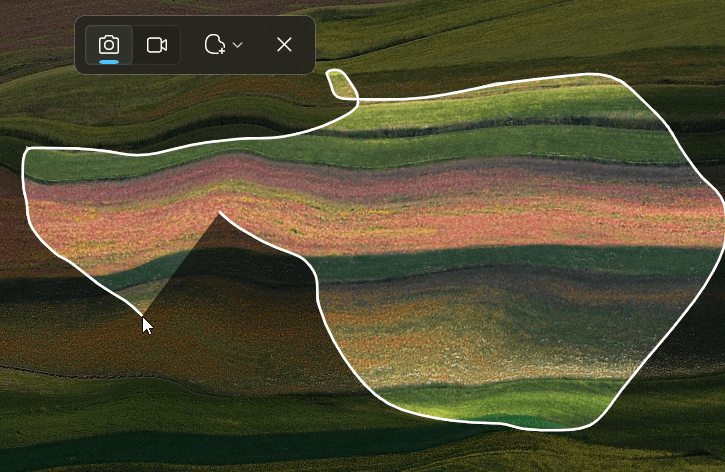
- Free-form Snip: You draw a custom shape around your desired object or area. This mode lets you draw any shape.
- Window Snip: You click on a specific application window to capture it.
- Full-screen Snip: This option captures your entire screen instantly.
You can also initiate these snips from the main Snipping Tool application after opening the tool.
How to Capture a Screenshot
Follow these steps to take a screenshot:
- Use the Windows + Shift + S keyboard shortcut or open the Snipping Tool app.
- Select your desired snip mode from the toolbar. Options include Rectangular, Free-form, Window, or Full-screen.
- If you choose Rectangular Snip or Free-form Snip, your cursor changes. Click and drag to select the screen area you want to capture. Release the mouse button to capture the snip.
- If you choose Window Snip, move your cursor over windows. The active window will highlight. Click the window you want to capture.
- If you choose Full-screen Snip, the tool captures your entire screen immediately.
After the capture, Snipping Tool copies the snip to your clipboard. A notification also appears. Click this notification to open the snip in the Snipping Tool editor for further actions like editing the image.
Using the Delay Feature
Sometimes you need to capture menus or tooltips. These items often appear only on hover or after a click. The Snipping Tool app helps with this, especially when taking screenshots of dynamic content.
- Open the Snipping Tool application. You can find it via Windows search.
- Click the clock icon or “Snip in X seconds” dropdown menu.
- Choose a delay time (for example, 3 seconds, 5 seconds, or 10 seconds).
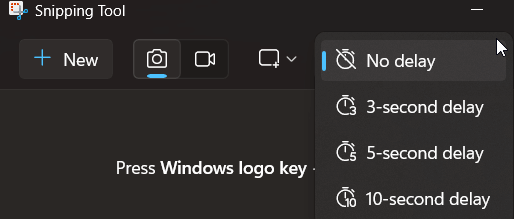
- Click the “New” button. The countdown begins.
- Open the menu or element you want to capture. Keep it visible until the screen dims and the screen capture occurs. This delay lets you prepare the exact snip you want.
Editing Your Snips
The Snipping Tool app has useful editing features. You can use these features after you take a snip to edit your image.
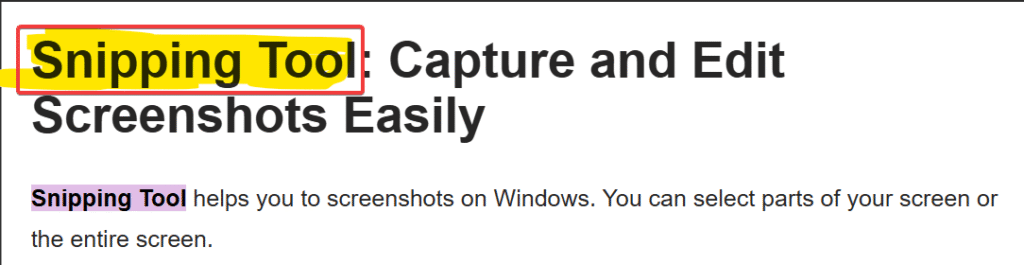
- Pen and Ballpoint Pen: You can draw on your snip. Choose different colors and line thicknesses. This helps you add notes or point things out. This tool allows you to draw attention to specific parts of the image or circle important details.
- Highlighter: You can emphasize parts of your snip. Select colors and thicknesses for the highlighter tool.
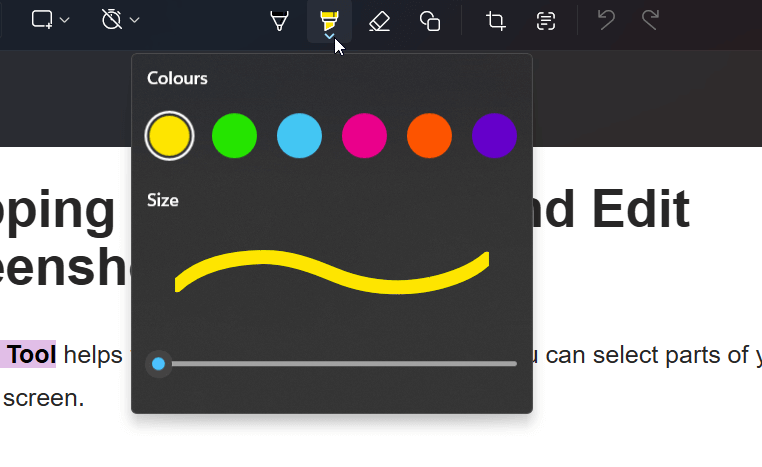
- Eraser: The eraser removes annotations you made. It does not erase parts of the actual screenshot.
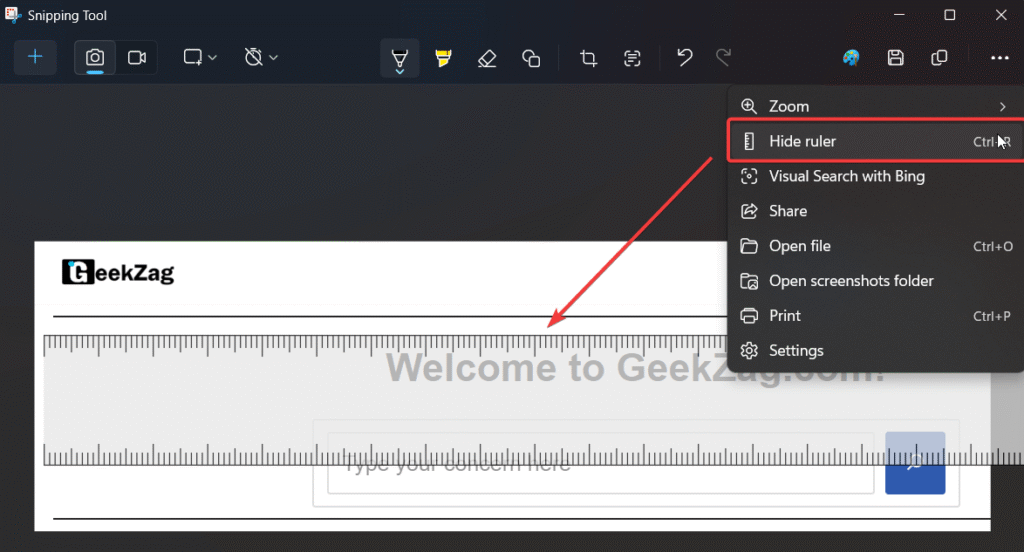
- Ruler and Protractor: These tools help you draw straight lines or angles accurately. Find them in the toolbar.
- Image Crop: You can adjust the borders of your snip. This tool helps refine the captured area or transform the image dimensions.
- Touch Writing: If your device has a touchscreen, you can write or draw directly on the snip with your finger or a stylus.
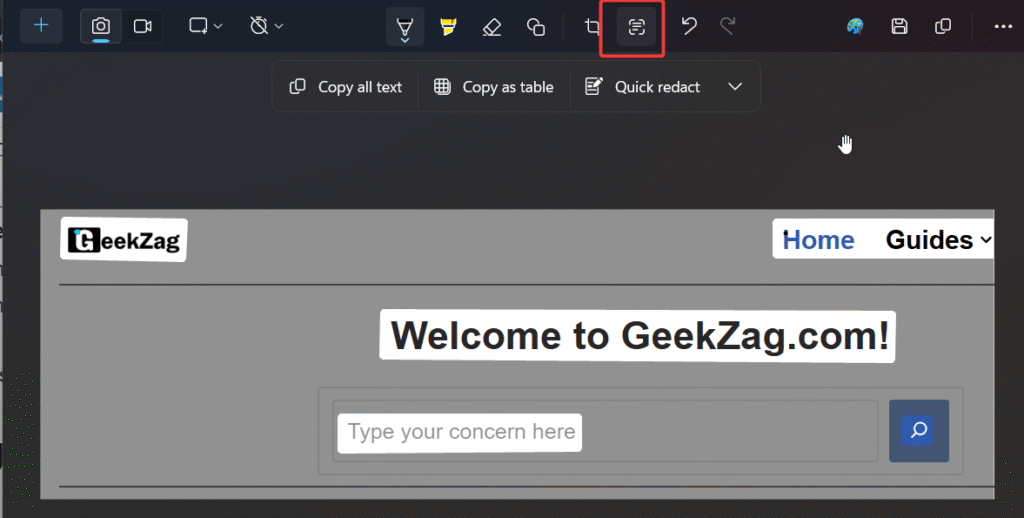
- Copy Text: Snipping Tool extracts text directly from your snips. This feature uses Optical Character Recognition (OCR). After you capture a snip, select the “Text actions” button. This action activates OCR for the image. OCR allows you to copy all text from the snip. You can also select and copy specific parts of the text.
- Redact Text: Additionally, a “Quick redact” tool helps you hide email addresses and phone numbers in your snip. Your device performs all text recognition locally. This keeps your information private.
Microsoft designed Snipping Tool to be a handy tool for quick edits.
Saving and Sharing Snips
After editing your snip, you can proceed with saving or sharing it.
- Saving: Click the “Save” icon (it looks like a floppy disk). Choose a file name for your snip. Select a folder to save the file. You can save snips as PNG, JPG, or GIF files. PNG files are good for screenshots with text. JPG files are suitable for photographs.
- Copying: Snipping Tool automatically copies your new snip to the clipboard. You can paste it directly into documents, emails, or chat applications using Ctrl + V on your keyboard.
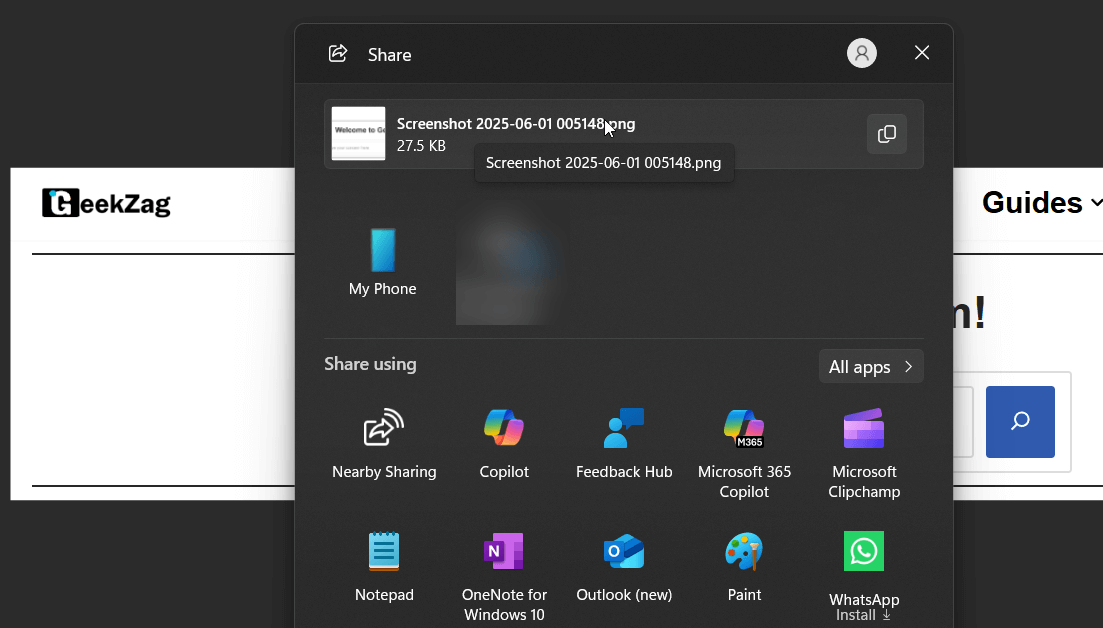
- Sharing: Use the “Share” button in the Snipping Tool app. This button lets you send the snip using email or other compatible applications on your computer device.
This process for saving or sharing is straightforward for any image you capture.
Screen Recording with Snipping Tool (Windows 11)
The latest version of Snipping Tool in Windows 11 adds screen recording capabilities. This transforms the tool from just a screenshot utility.
- Open the Snipping Tool application.
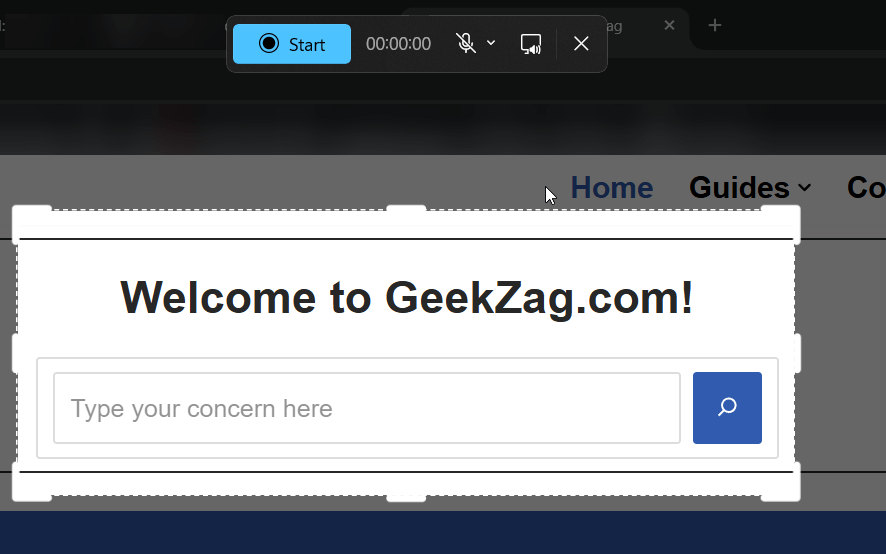
- Select the “Record” button. It looks like a small camcorder icon.
- Click the “+ New” button.
- Drag your mouse to select the area of the screen you want to capture for your video recording.
- Click “Start.” A brief countdown will appear before the recording begins.
- A control bar appears. This bar allows you to pause, stop, or delete the current recording.
- When you finish recording, click the “Stop” button.
- The recording opens in the Snipping Tool app. You can review the video.
- Save your video recording. It cna saves screen recordings as MP4 files.
For more details on using Snipping Tool, you can visit the official Microsoft Support page.
Benefits of Using Snipping Tool
Snipping Tool offers many advantages for Windows users. This tool for capturing your screen enhances productivity.
- Speed: It quickly captures information from your screen when you need to capture something fast.
- Precision: You capture exactly the part of your screen you need.
- Annotation: Simple tools allow immediate highlighting or notes on your captures. You can annotate your image effectively.
- Communication: Visuals improve understanding. Use snips in emails, reports, or tutorials. Visuals make instructions clearer, as discussed in principles of visual communication.
- Built-in: Snipping Tool is a free utility. It comes pre-installed with Windows. No extra download is necessary to use Snipping Tool. Snipping Tool is one of Microsoft’s handy utilities.
Using the Snipping Tool can significantly improve how you share information from your PC.
Tips for Effective Use
These tips help you use Snipping Tool better.
- Learn Shortcuts: The Windows key + Shift + S keyboard shortcut is very fast for taking screenshots. Press Windows key + Shift + S to activate it.
- Use Delay: Capture pop-up menus or other dynamic content easily with the delay feature. This lets you set up the perfect snip.
- Choose Modes Wisely: Select the best snip mode (Rectangular, Free-form, Window, or Full-screen) for your specific screen capture need. The free-form mode lets you draw any shape.
- Annotate Clearly: Use the pen or highlighter tools to draw attention to key details in your screenshots. You can circle important objects.
- Save Appropriately: Choose the correct file format (PNG, JPG, GIF) for your needs and audience. Save the image to a known folder.
This tip guide for Snipping Tool in Windows will help you capture what you need.
Conclusion
Snipping Tool is a valuable Windows utility. This handy tool helps you capture, annotate, and share screen information efficiently.
You’ll learned how to access the tool, use its various modes to capture screenshots, edit any image, and even use video recording in Windows 11. Start using these features today. Make your communication clearer with precise screenshots and recordings.
Using this screenshot tool will transform your productivity when you need to capture something from your screen. Share this guide with others who might find it helpful. Post your favorite Snipping Tool tips or questions in the comments below.
Read more: How to screenshot on Windows
Frequently Asked Questions
Users often ask these questions about Snipping Tool.
Is there a free Snipping Tool?
Yes, ii is a free utility. Microsoft Windows includes Snipping Tool. You do not need to pay for this tool.
Does Snipping Tool save history?
The Snipping Tool app may show your most recent snips within its window. It does not keep a long-term, browseable history of all captures. You save individual snips as files to your computer PC. It also copies new snips to your clipboard.
How do I open the Snipping Tool quickly?
You can open the Snipping Tool quickly. Press the Windows key + Shift + S keys together. This keyboard shortcut immediately activates the snipping overlay for instant capture. This is the fastest way of opening the snipping tool for a quick snip.
Can I capture menus with the Snipping Tool?
Yes, you can capture menus with the Snipping Tool. Use the delay feature in the full Snipping Tool application. This feature gives you time to open the menu before the tool takes the screenshot. This delay lets you capture the exact menu snip you want.
How do I change the Snipping Tool’s default save location?
Snipping Tool does not have a permanent default save location setting. When you save a snip, a “Save As” window appears. This window usually remembers the last folder you used for saving files. You select the save folder each time you save a new snip or image.
Can I annotate my snips?
Yes, you can annotate your snips. The editor provides tools like Pen, Highlighter, and Eraser. These tools help you add marks, drawings, or text highlights to your screenshots. You can draw a shape or circle important elements.
Is it possible to capture scrolling windows?
The standard Windows Snipping Tool does not directly capture scrolling windows or long web pages in a single snip. You might need to take multiple snips and combine them. Some third-party applications or browser extensions offer this specific feature for full-page screen capture. For now, the default Snipping Tool in Windows focuses on visible parts of your screen.
IT Security / Cyber Security Experts.
Technology Enthusiasm.
Love to read, test and write about IT, Cyber Security and Technology.
The Geek coming from the things I love and how I look.