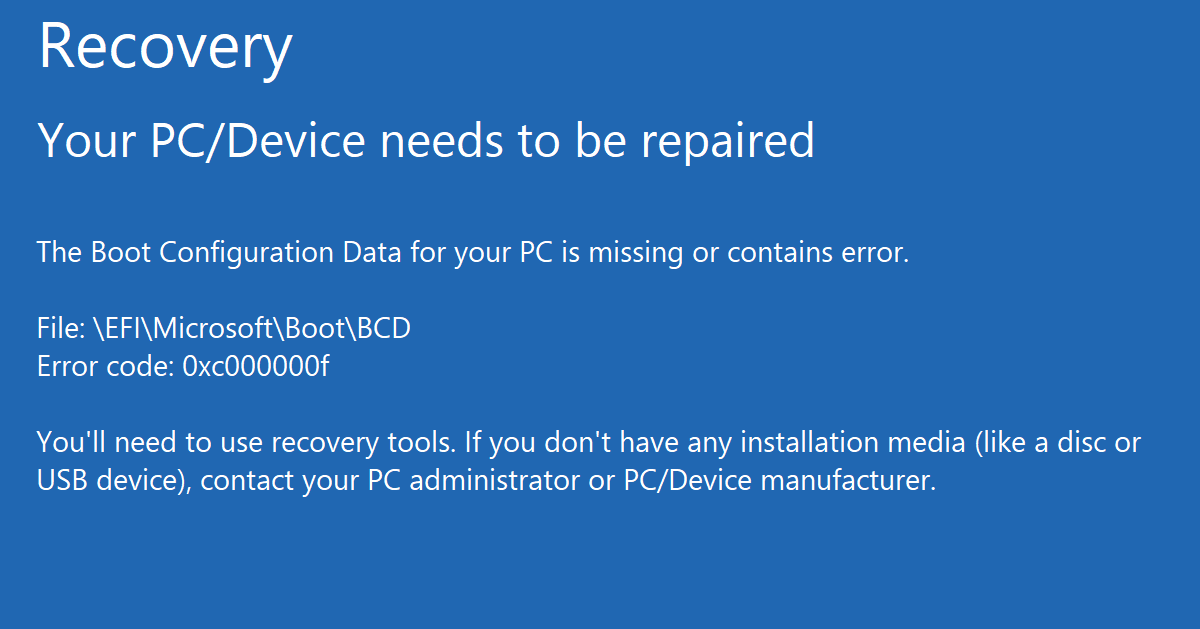
Your Windows 10 was perfect yesterday, until you turn ON your computer today and BOOM! It shows error on “The Boot Configuration Data For Your PC Is Missing“.
Well, don’t worry. No data is lost when you received this error. I will show a full step-by-step on how to fix it.
First, you’ll need a DVD or USB stick containing Windows installation media. You can download a utility from Microsoft here that will create that for you. Next, follow these steps:
How To Fix “The Boot Configuration Data For Your PC Is Missing”
1. Plug in your USB drive installation media into your computer.
2. Turn ON your computer (if currently in shutdown mode) or restart your computer.
3. Enter your boot menu on BIOS. Different computer brand and model using different way on accessing boot menu. Usually, by click F12 button on startup BIOS screen, it should do. There are multiple ways to check computer brand and model.
4. Wait until your computer to boot up from USB drive. A Windows Start menu will show on the first step.
5. On the Windows Start menu, choose My language is English (or depends on your preferable language).
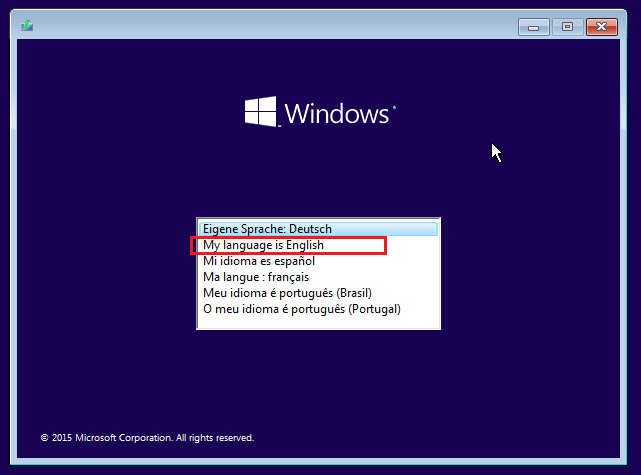
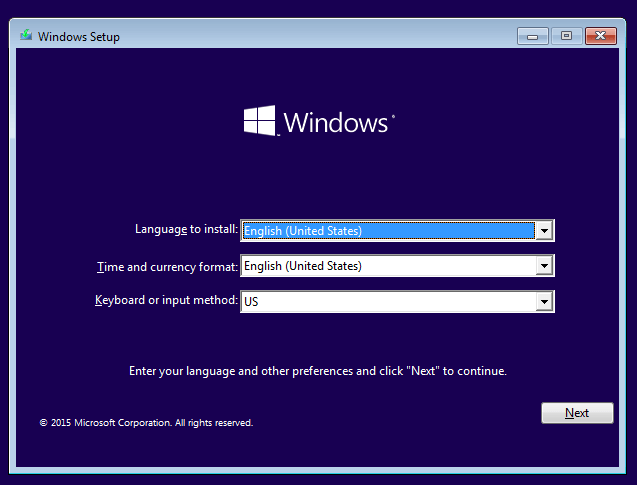
6. Leave as default and click Next.
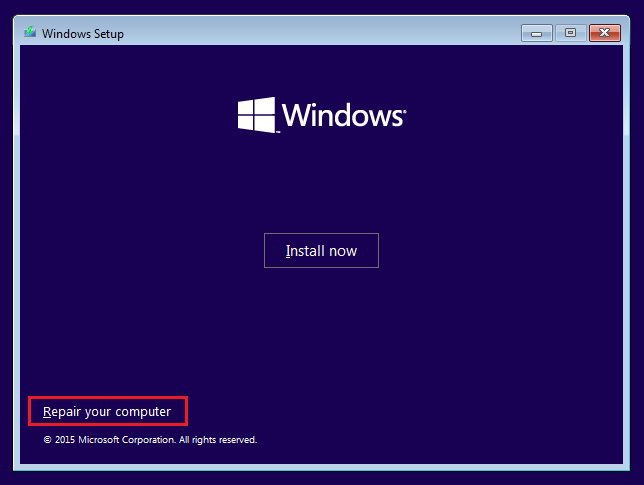
7. At the left button of the Windows, click Repair your computer.
8. Click on Troubleshoot (Reset your PC or see advanced options).
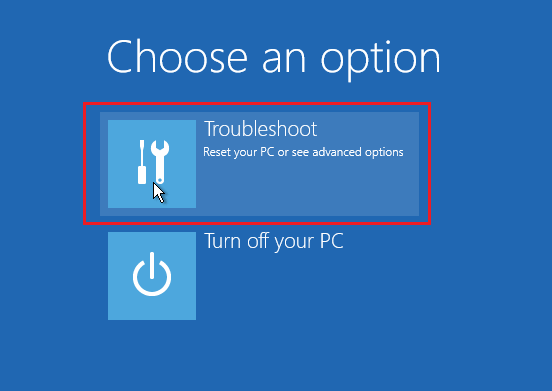
9. Click Advanced options.
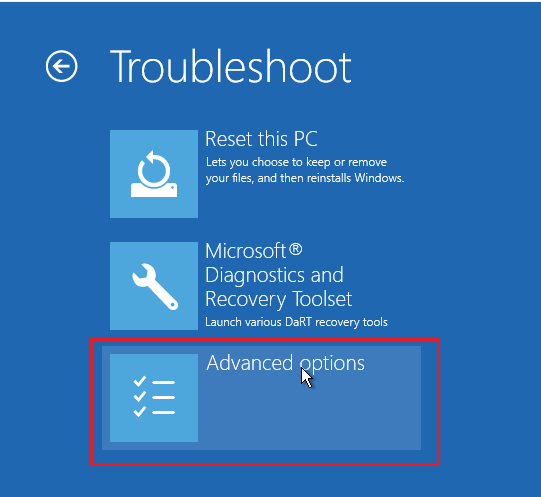
10. Click Command Prompt (Use the command prompt for advanced troubleshooting).
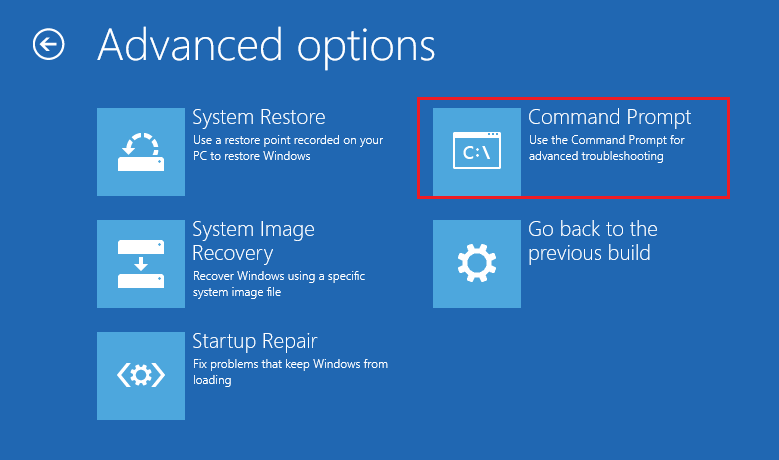
11. Once command prompt is open, type bootrec /fixmbr and press enter button. If success, a message will be shown as “The operation completed successfully“.

12. Type bootrec /fixboot and press enter button. If success, a message will be shown as “The operation completed successfully“.

13. Type bootrec /scanos and press enter button.
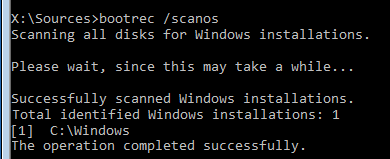
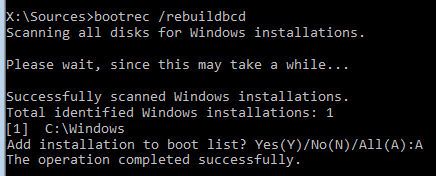
14. Type bootrec /rebuildbcd and press enter button. Type A, when the Windows asking to “Add installation to boot list?”. If success, a message will be shown as “The operation completed successfully“.
15. Now close the command prompt windows by hit on X button on the top of the window.
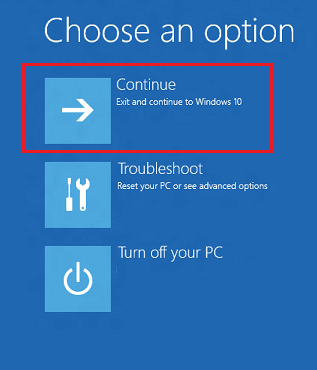
16. Click Continue to go to boot into your Windows and login Desktop.
Thanks for reading this article. I hope you find it helpful.

